
2 June, 2019
Shrunken Doll Heads
Even though Halloween is in the fall, spring is the best time to start planning. It gives plenty of time to shop thrift stores and garage sale for appropriate items, and I can work on the crafty stuff while glamping.
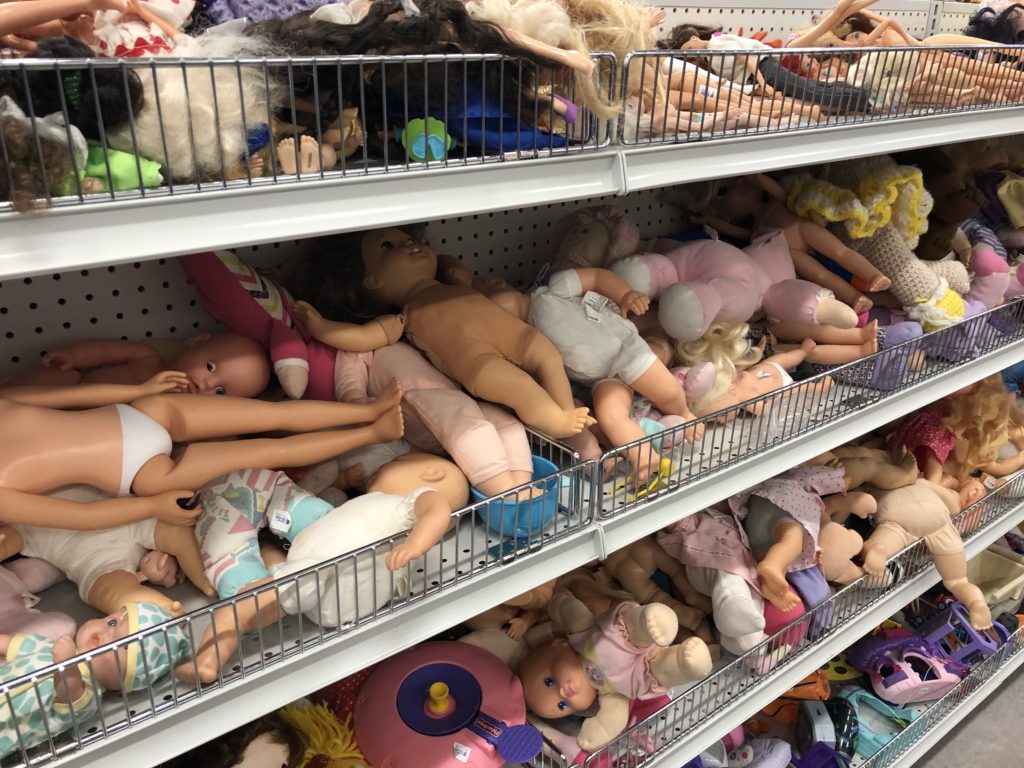
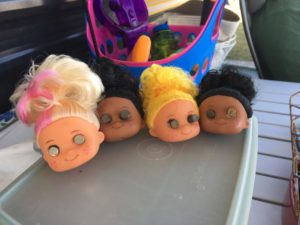
In anticipation of making a “Head Shrinker” costume for our next Halloween concert, I started shopping doll heads and supplies in spring of 2017. The large second hand stores had rows and rows of dolls to choose from, looking something like a Frankenstein Assembly line. Since the costume will be worn at a concert for children, I wanted shrunken heads that are not too gross or scary, and I was lucky enough to find appropriate subjects in new condition. I put the dolls and some craft supplies in a bag and took it on my next glamping weekend at the river.
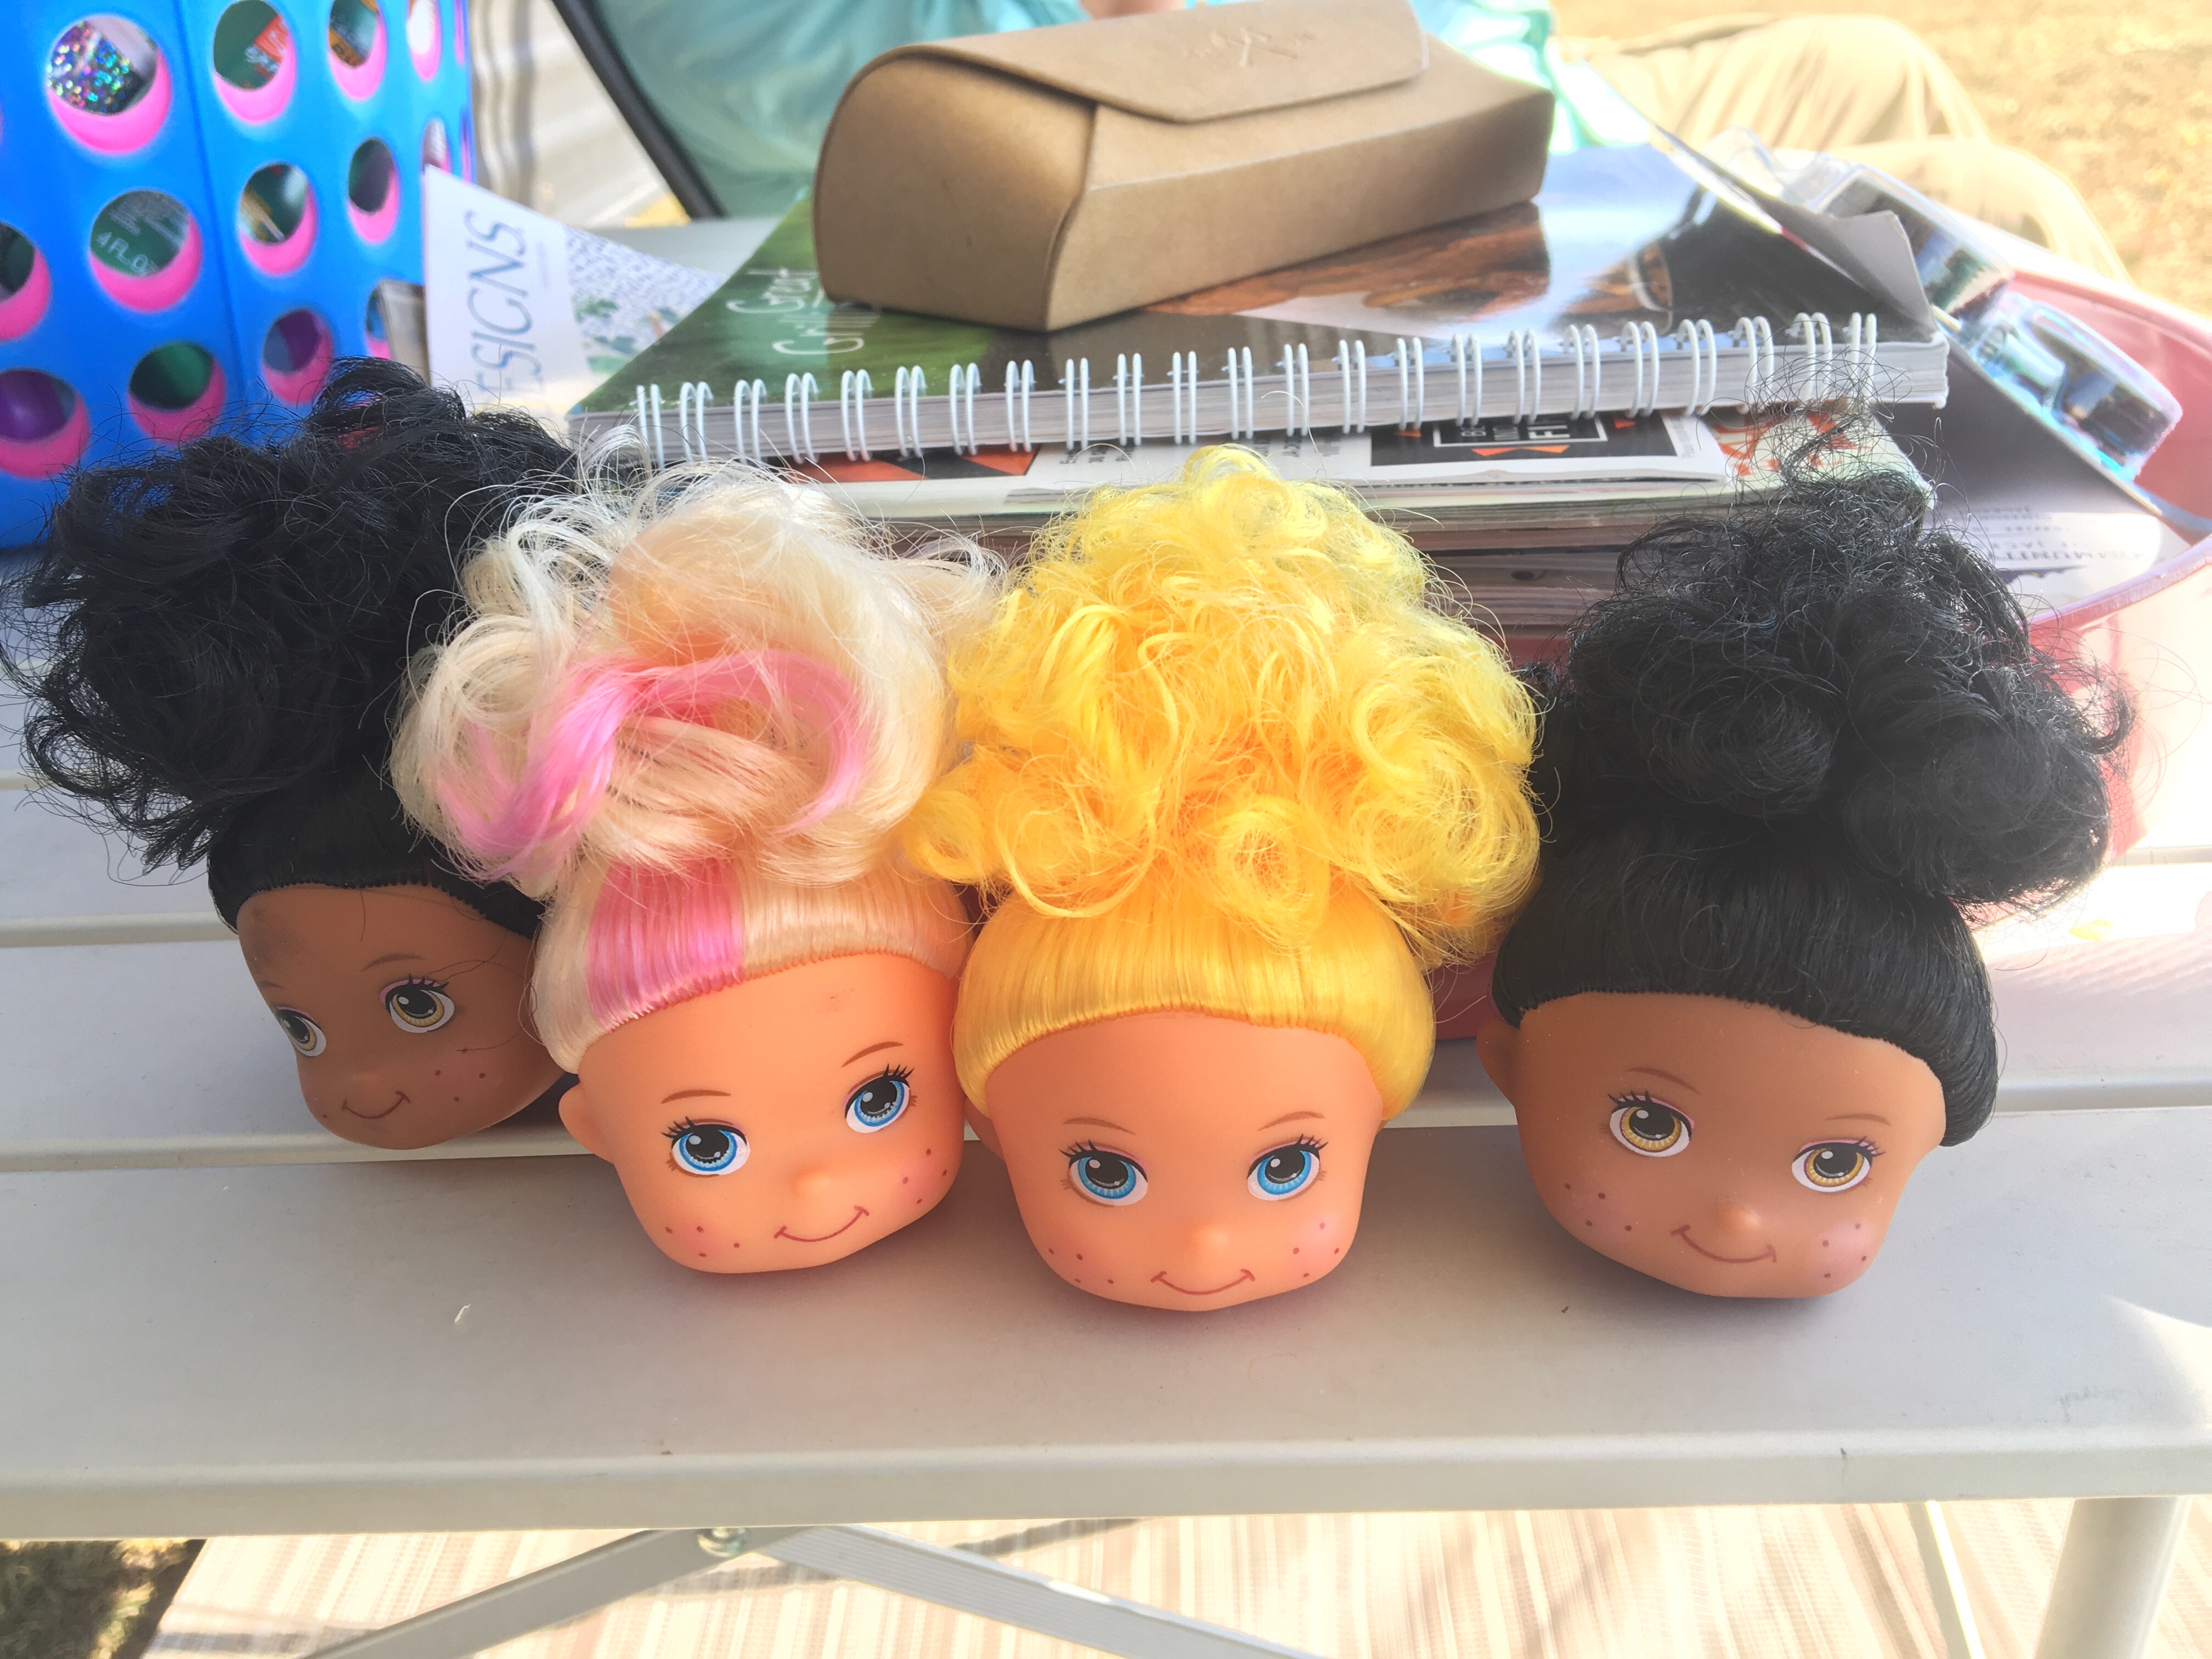

Sitting under the camper awning with my coffee, I took a good look at the dolls, my supplies, and came up with a plan. The first thing I did was snap the heads off at the neck and put the bodes back in the bag. This took some effort but was not too difficult. Yes, it did make a nice snapping sound.
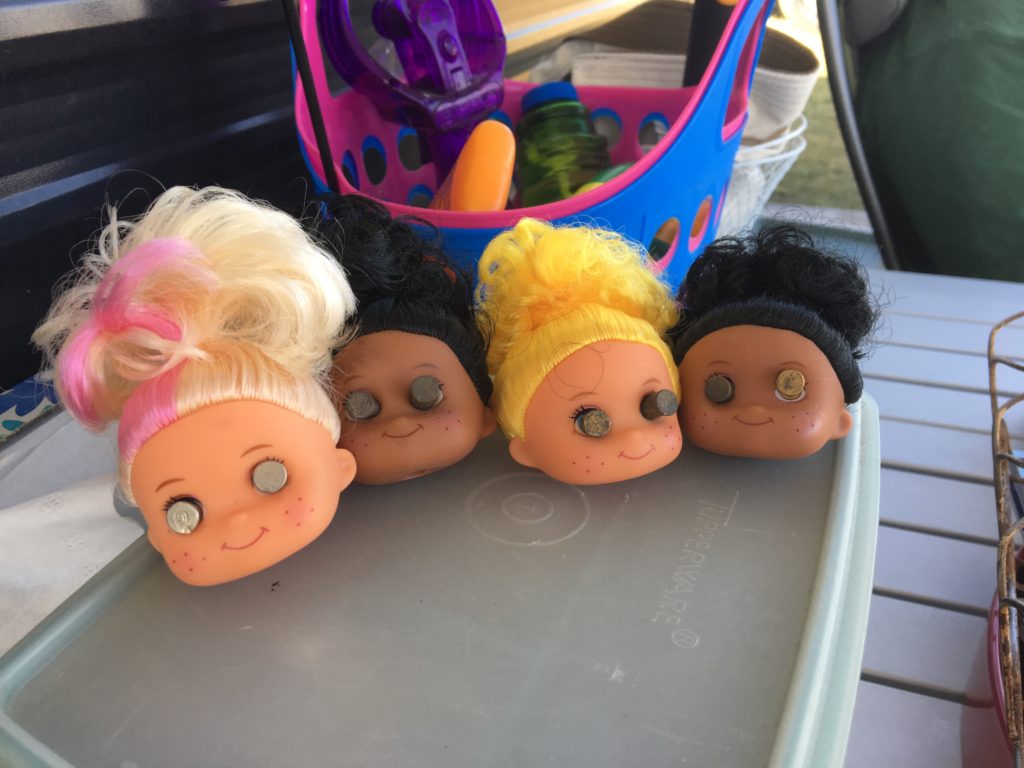
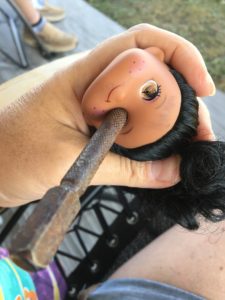
My dolls had painted faces, I knew once they were covered in goop they would not have any definition so I decided to poke some eye sockets into them with a punch tool. When I pulled out the punch tool, the plastic went back to its original position – almost immediately. #UGH
I had some spent 22 shells in my metal detecting finds pouch so I used them to shape the holes and I set them in the hot sun for the day. At this point my husband looked at what I was doing and gave me a funny look, not funny “ha ha”, funny “WTF”. I told him these are for [my psychiatrist friend], she’ll vouch for me if I’m arrested. Although, I’m quite sure when I post this on my blog for the world to see, it will send up some red flags at the FBI’s Behavioral Analysis Unit. ESPECIALLY if they see the Valkyrie Costume where I plucked the feathers out of angel wings and cut the wings off Christmas doves.
Roadblock:
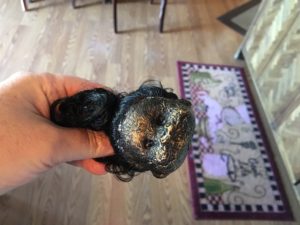
When I was surfing Pintrest for ideas, all the really good looking ones were painted dark. I liked that “rotten” look and decided to mix some black chalkboard paint with some Mod Podge. It looked great when it was wet, it had a “gooey” look and the color was varied enough to look rotten.
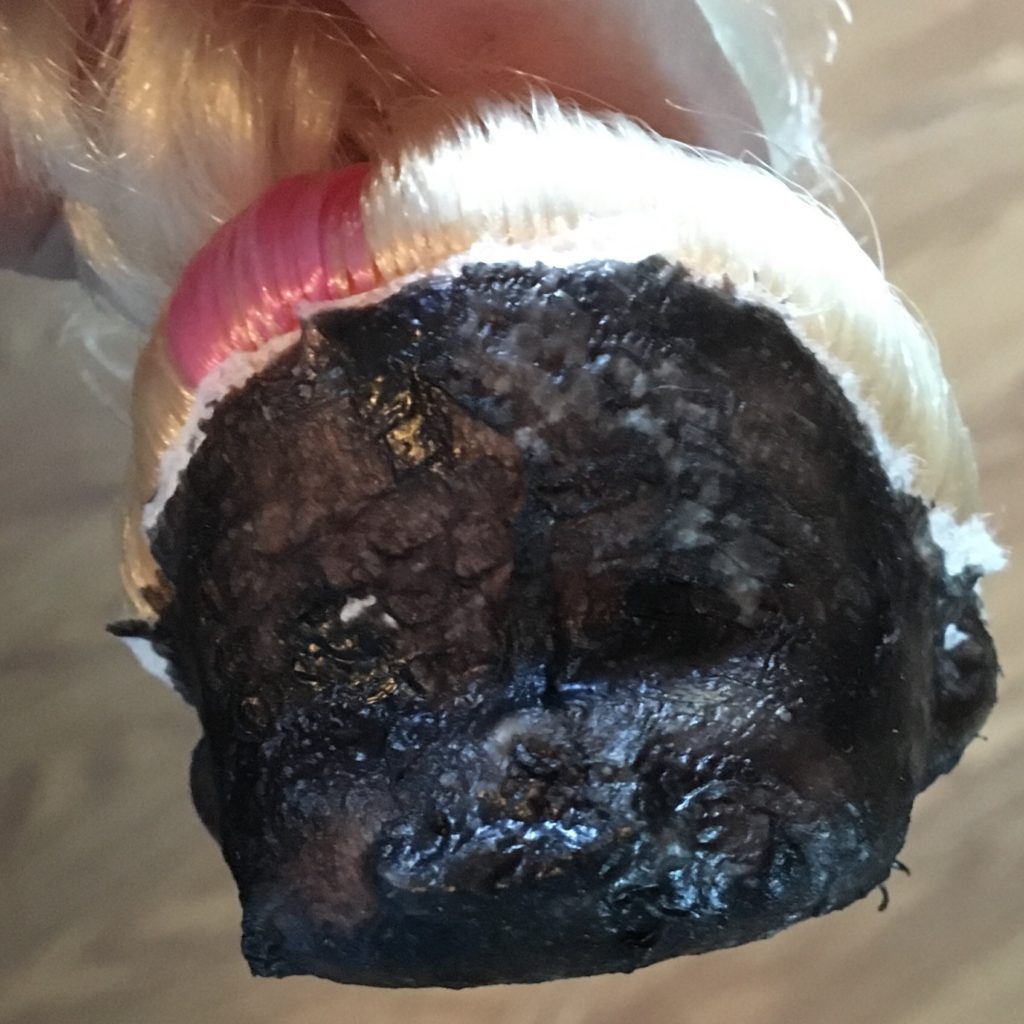
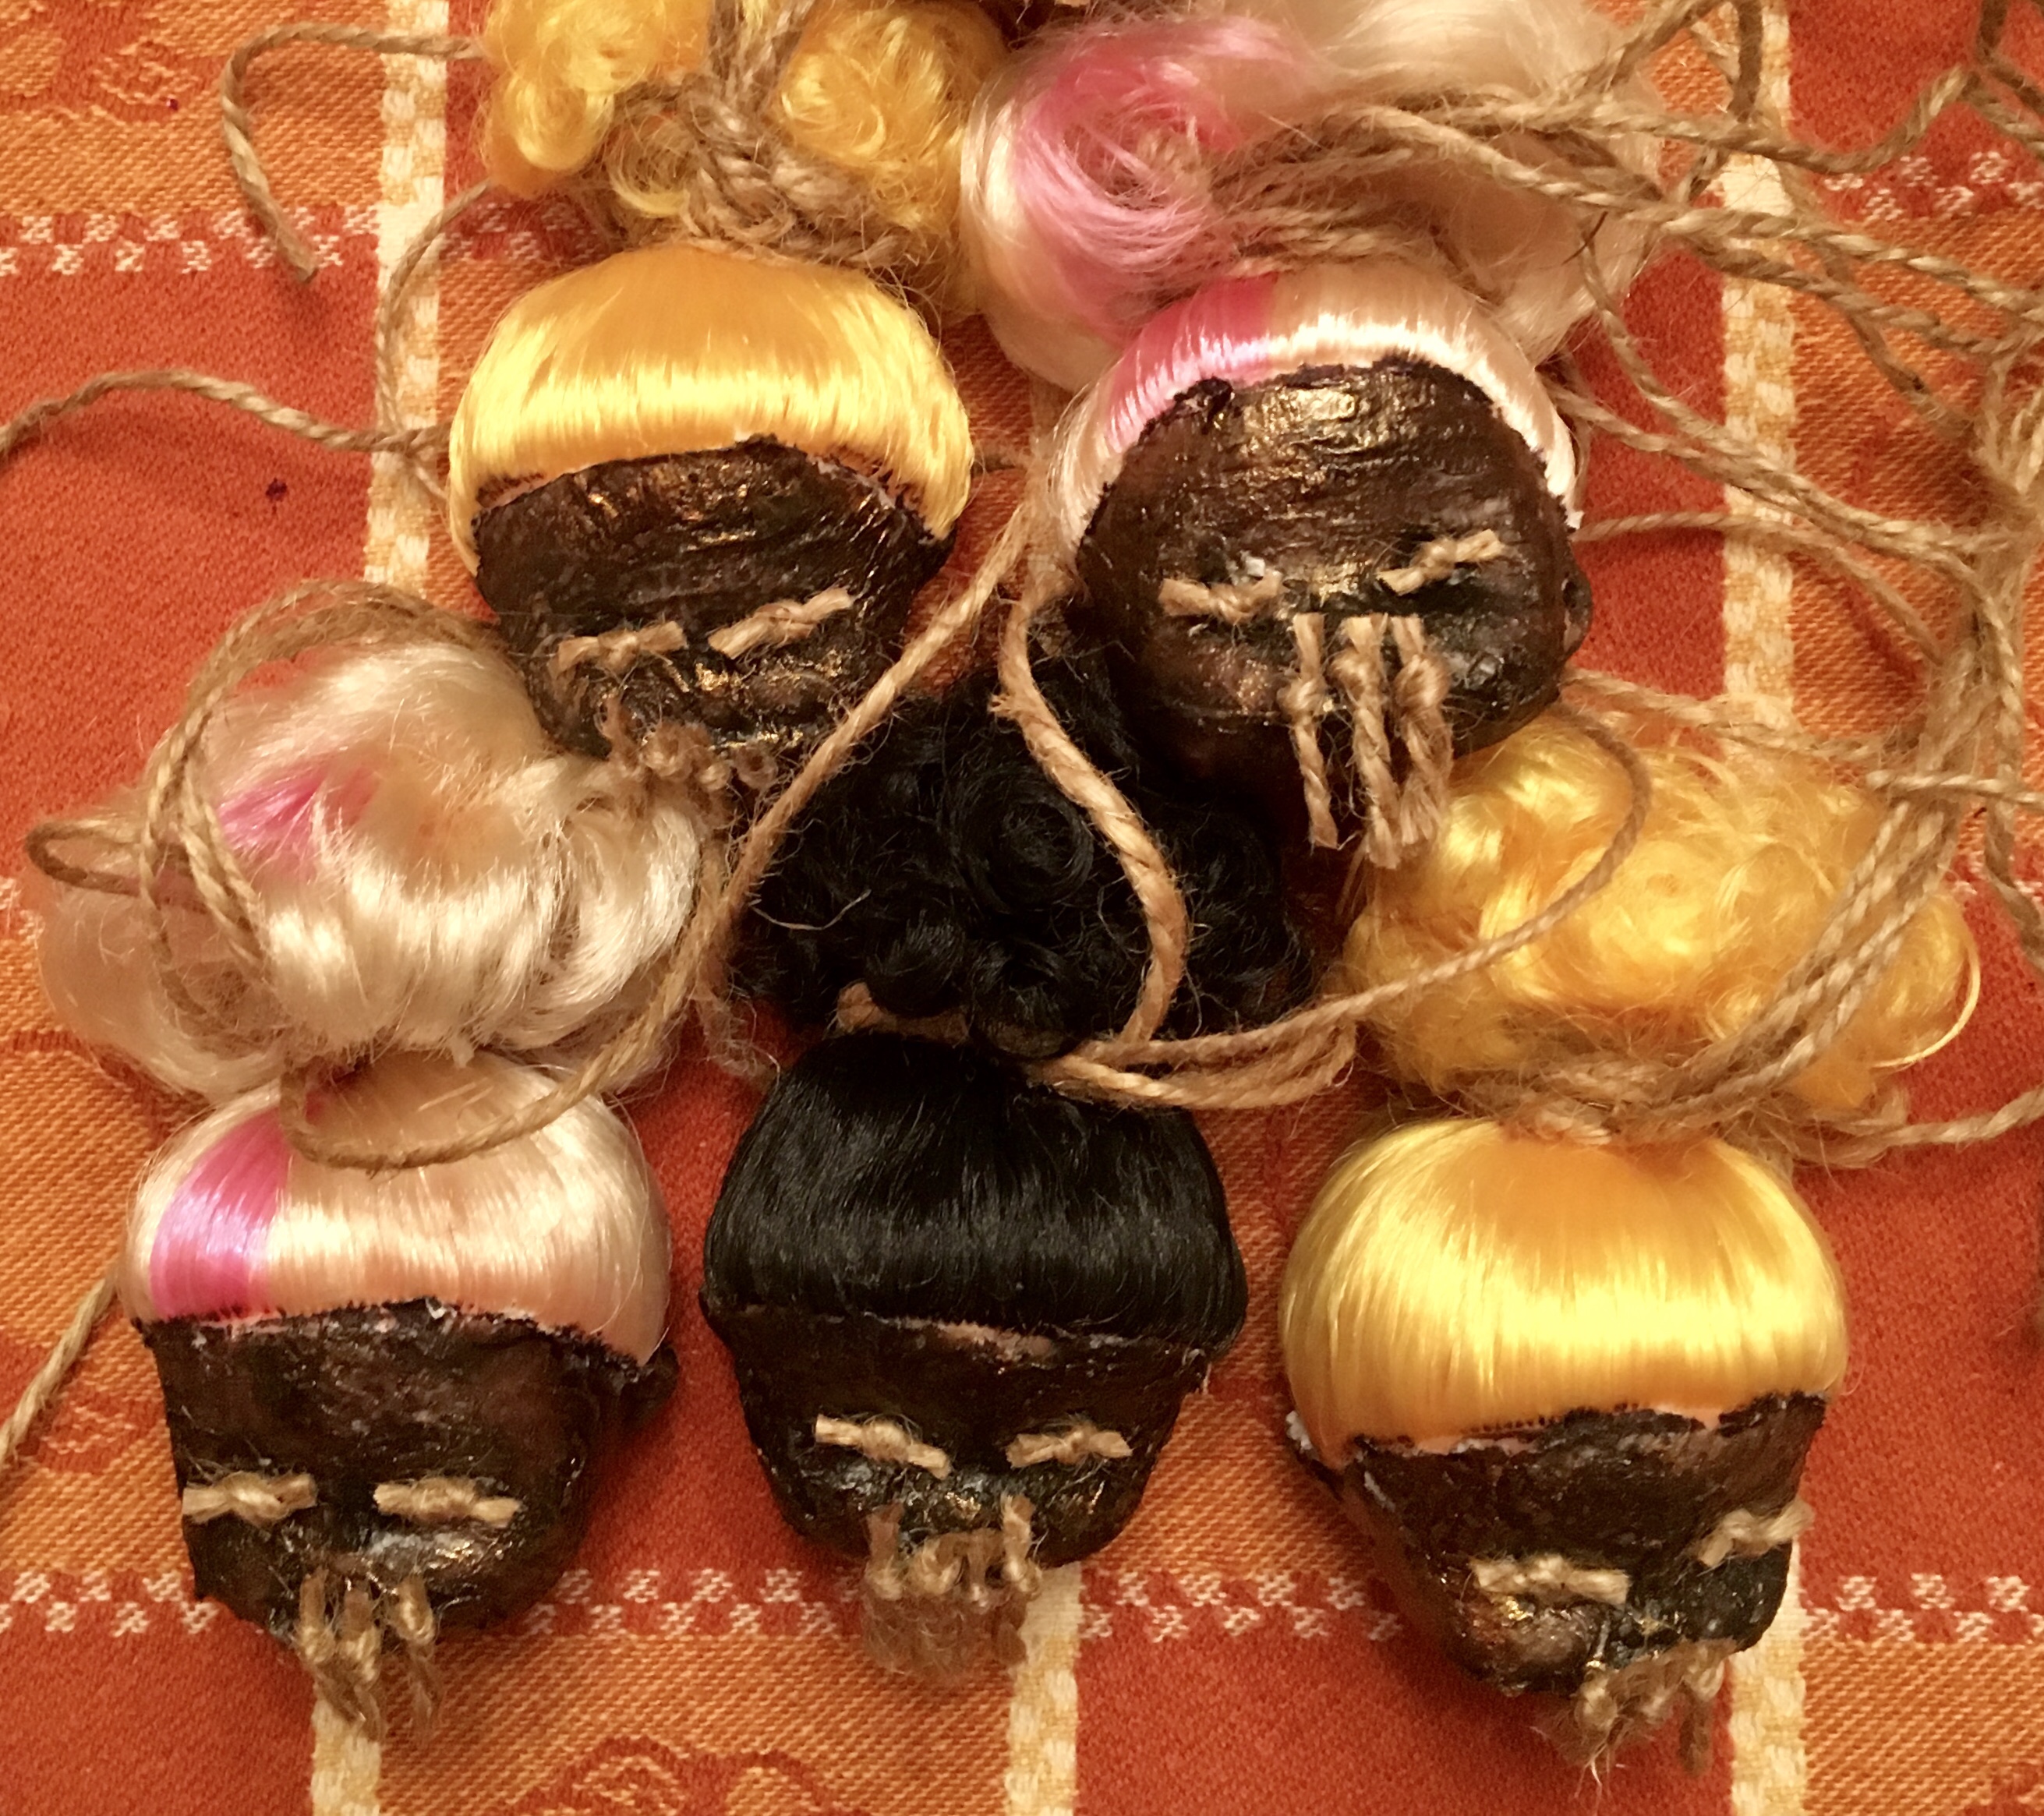
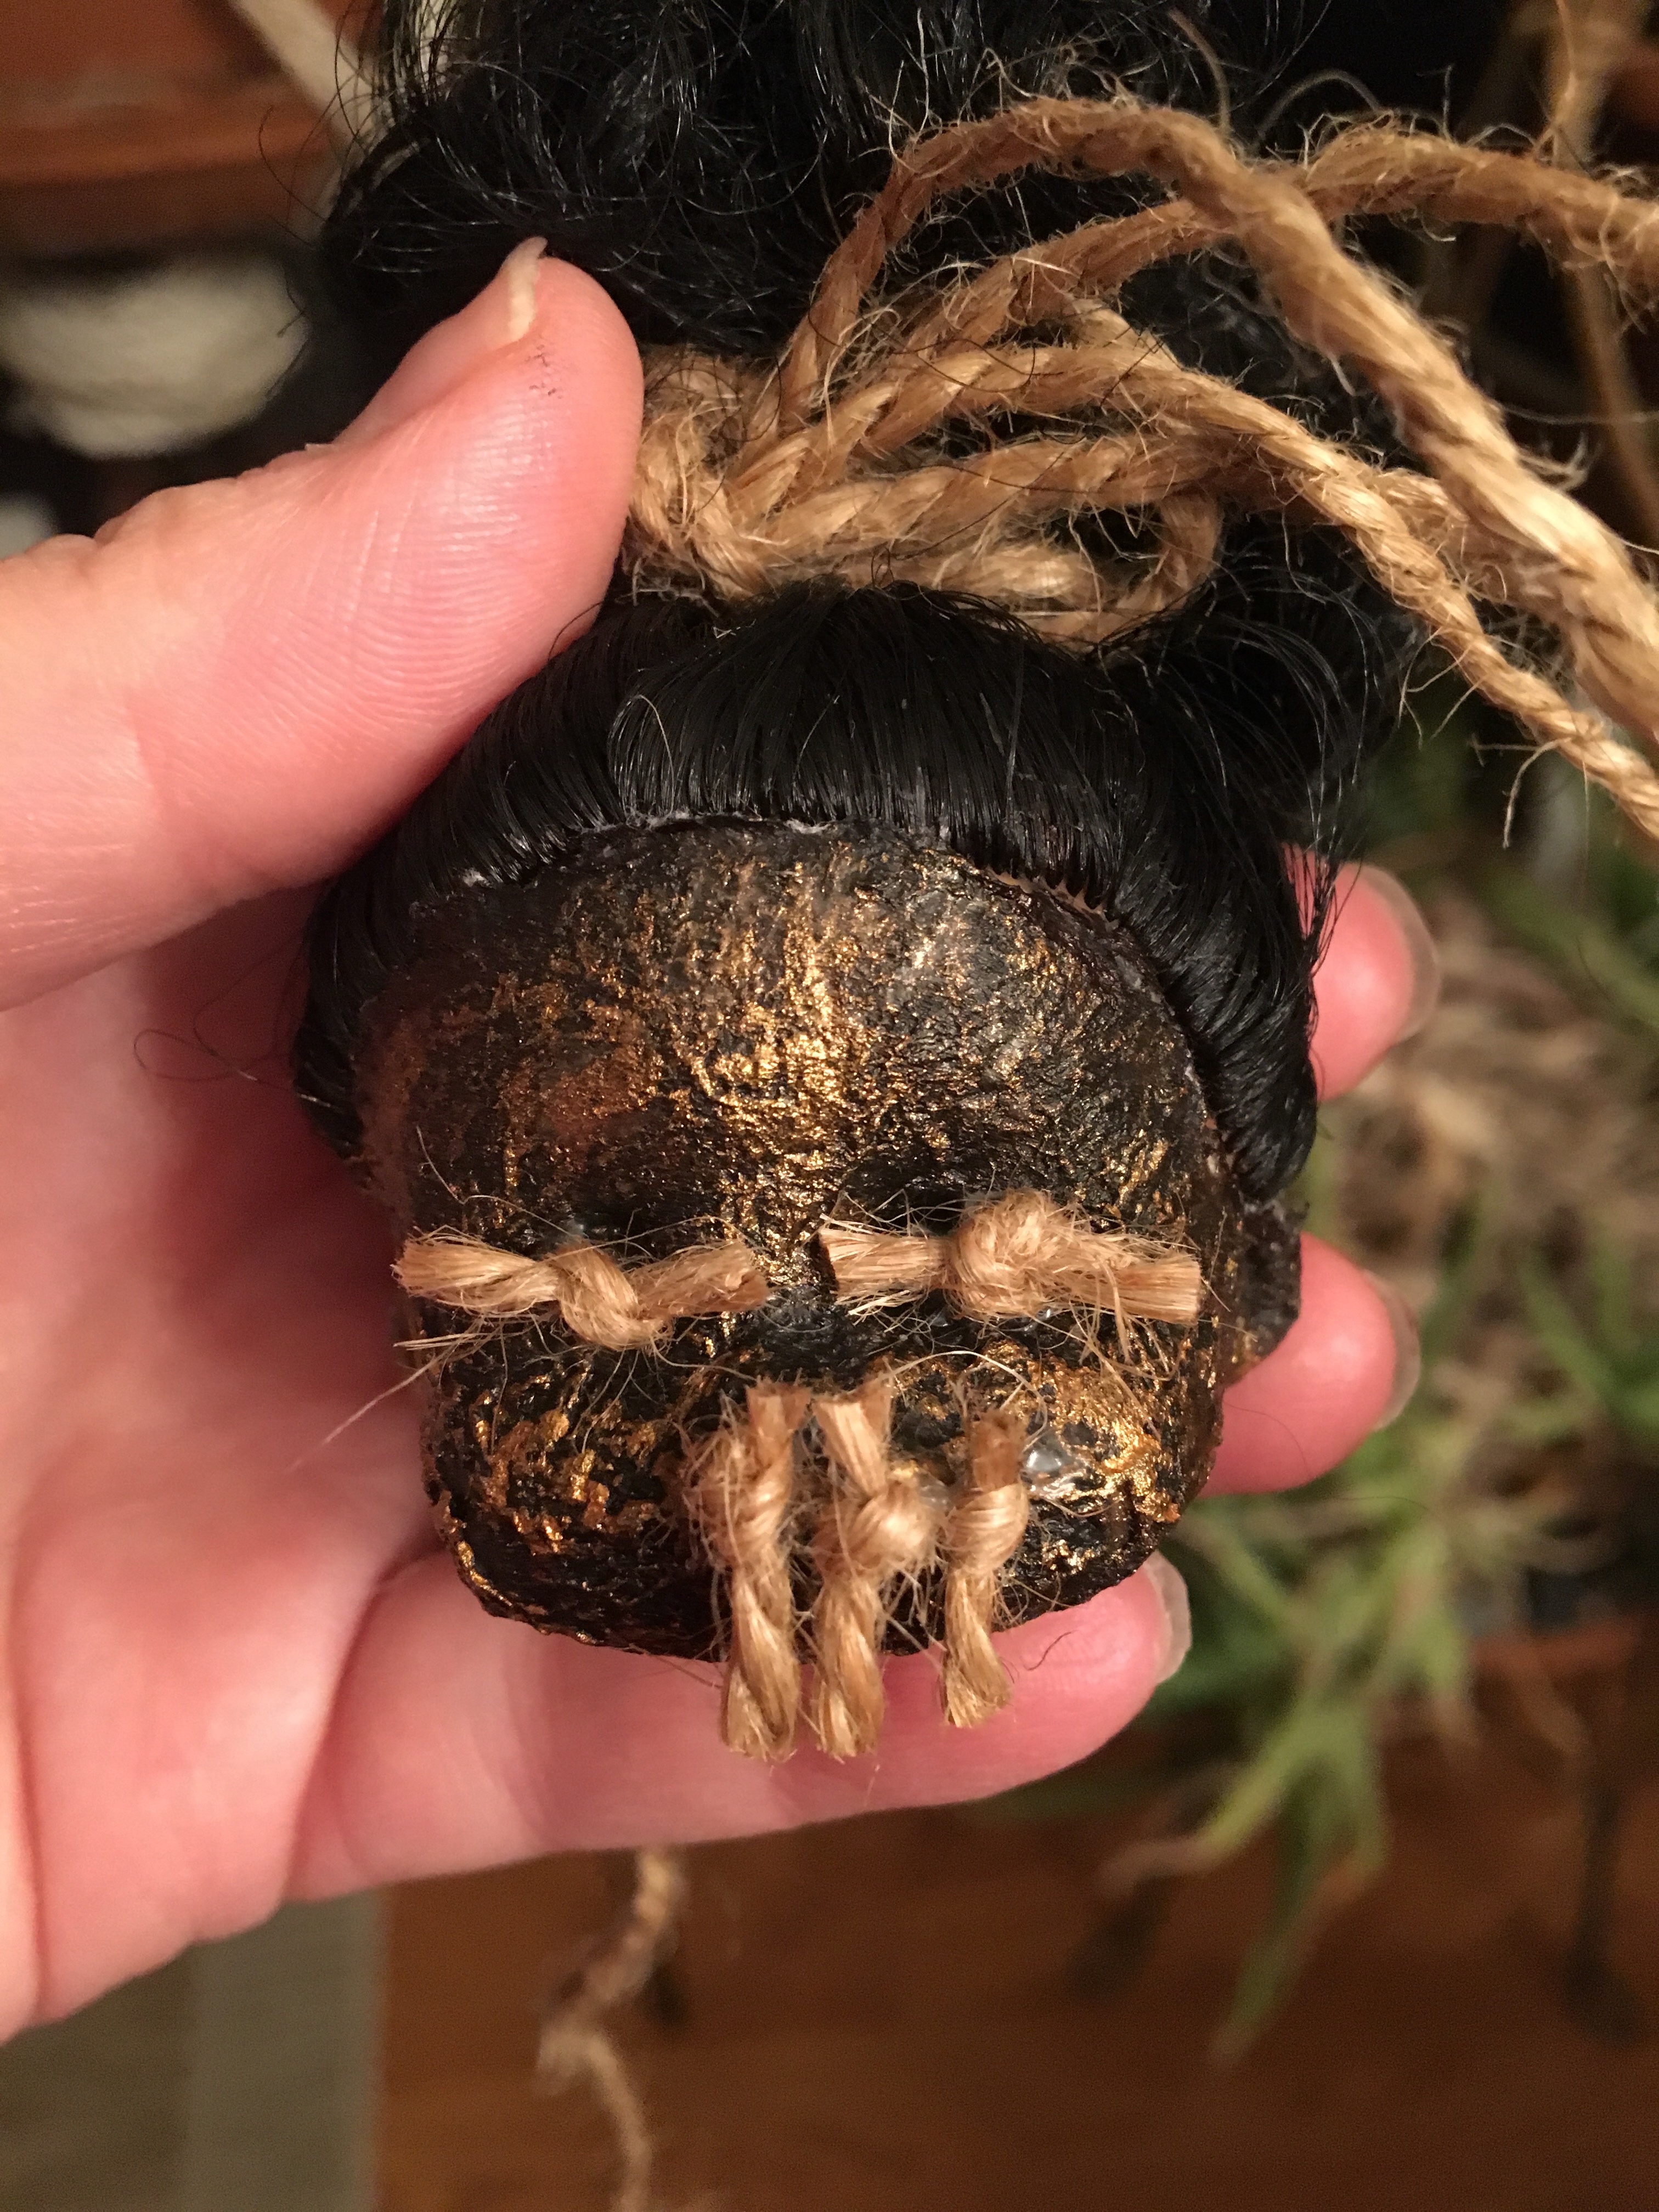
BUT – When it dried it looked inappropriately like black-face. Totally not what I was going for! After having an “oh poop” moment, I retreated to my craft room to see what I had to change the look. I had some metallic paints so I grabbed a gold bottle and went to work. MUCH better! Bronze or copper would have probably worked too. Be sure to let me know what color comb you used in the comments.
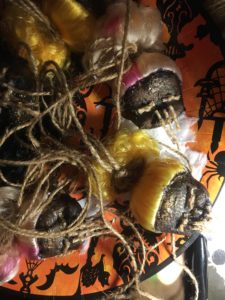
A little jute and the heads came out awesome! I also made an adjustable headdress (will post on a later date) , added some hula skirts and the costume was a success! Once of the flute players was Beetlejuice that year, the costume fit in perfect!

Shrunken Heads
Equipment
- Awl or Punch Tool
- Brush for Mod Podge
- Exacto Knife
- Hot Glue Gun
- Sponge Brush
Materials
Thrift or Dollar Store
- 6 Doll Heads of same or similar size
Craft Supplies
- 1 Roll Jute Twine
- 1 Stick Hot Glue
- 1 Bottle Mod Podge
- 1 Bottle Mat Black Craft Paint I used chalkboard style
- 1 Bottle Metallic Craft Paint Bronze, Copper, or Gold
- Tacky Glue
Household Items
- Facial Tissue or Toilet Paper White
- Paper Plates
Instructions
Prep Doll Heads
- Break Head from Body. Save the body parts for other projects.
- Clean the grime off the doll head. A little rubbing alcohol will work. If your dolls were extra loved in it's previous life a good scrub with Dawn, then a thorough rinse might work better.
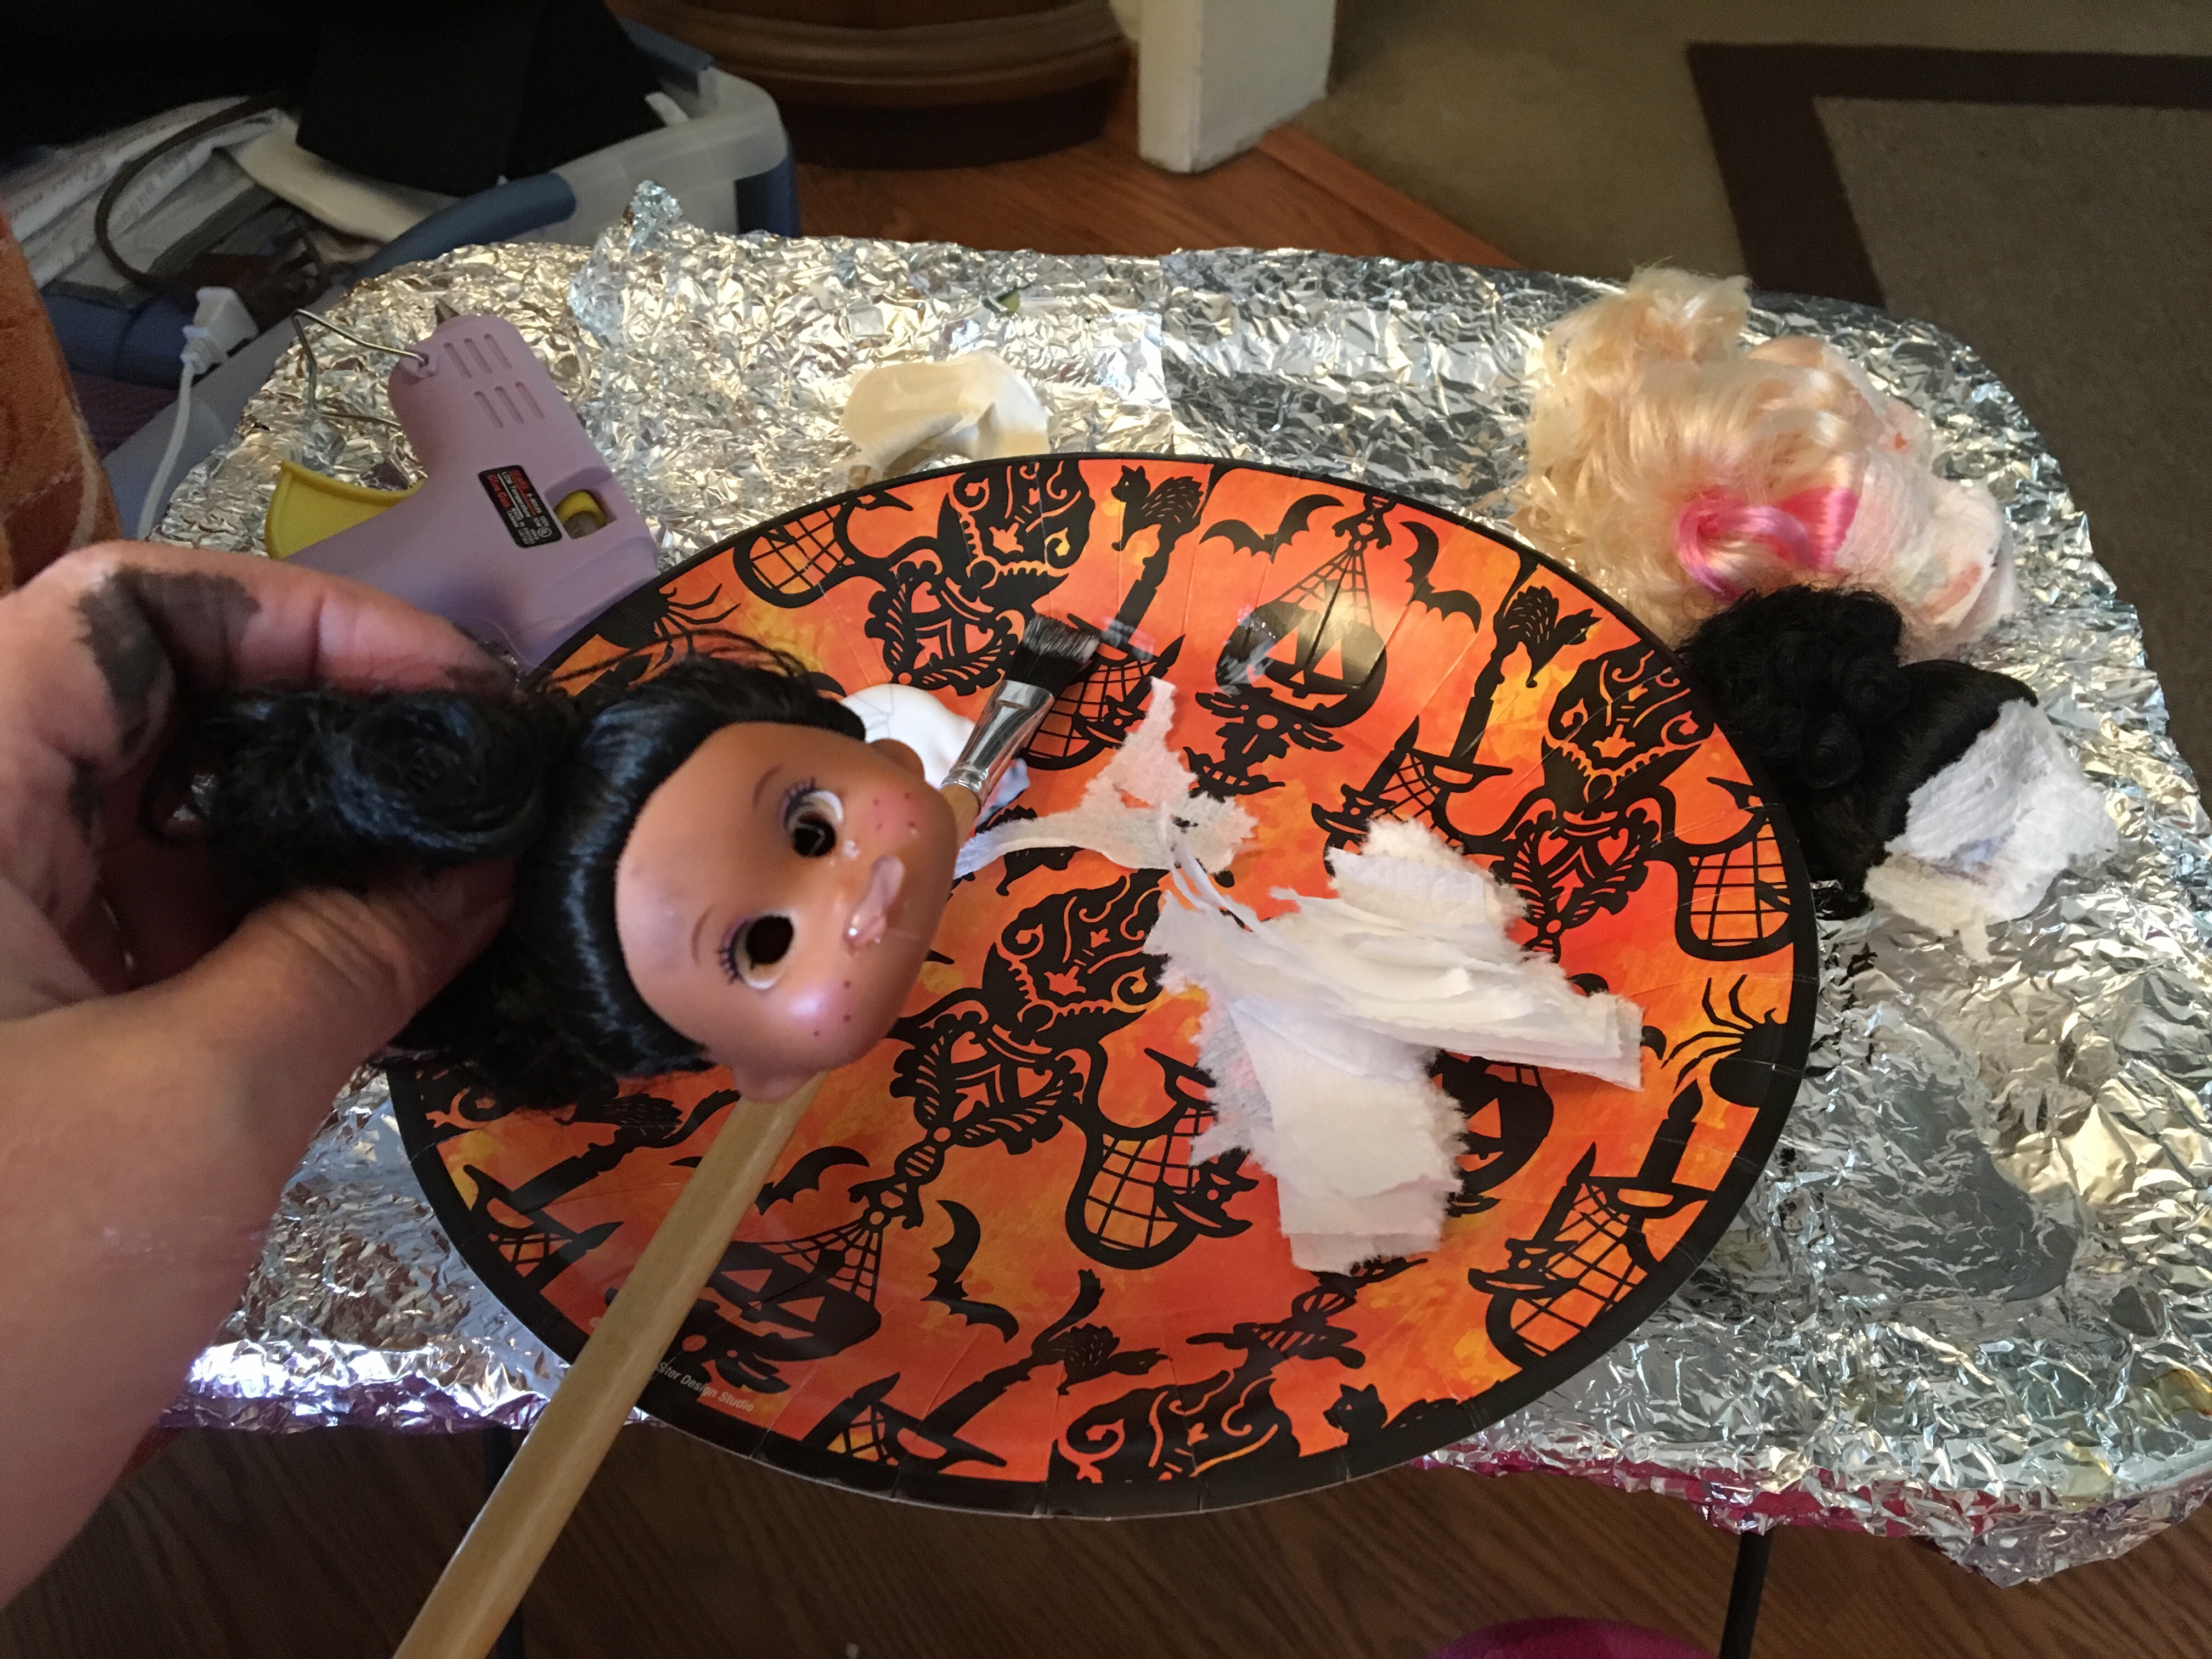
- Hair: Ponytail the dolls hair on top of the head so that when it hangs from the hair, the face looks out not down. Use rubber bands or wire ties, whatever you have handy. It will be covered later. Doing this first gives you something to hold onto for the rest of the project, and keeps the hair out of the Mod Podge and paint.
- The head needs exaggerated eyes, nose, and mouth so when all the goop is added it still has depth.
- Eyes: You will need divots for the eye sockets. If your doll's eyes are separate parts carefully remove them so you can use them for other projects. If the eyes are painted use an awl to poke eye holes into the head.
- The plastic will want to return to it's original shape. Find something to put in the holes and set in the sun for a day or two. I used spent 22 shells, leaving my husband questioning my intentions. These will be removed before the Mod Podge steps.
- Mouth: If your doll has painted or small mouth, use the hot glue gun and add a single line of glue to shape the lips. Don't worry about detail, they just need to stick out from the head so when all the goop is applied there is a protruding line where the mouth should be.


"Shrink" the Heads
- Tear up the tissue or TP into random shapes between quarter and half dollar size. and set aside.
- If you trained the plastic by leaving something poked in the eyes, remove them now.
- Put some Mod Podge on a paper plate, Brush the doll head with the Mod Podge and press in the tissue pieces, working in sections and overlapping tissue. Cover the whole head, being careful not to get any goop in the hair. Be sure to press in the eyes so that they are covered but are sunken in. (there sould not be a hole showing, just an indent.)
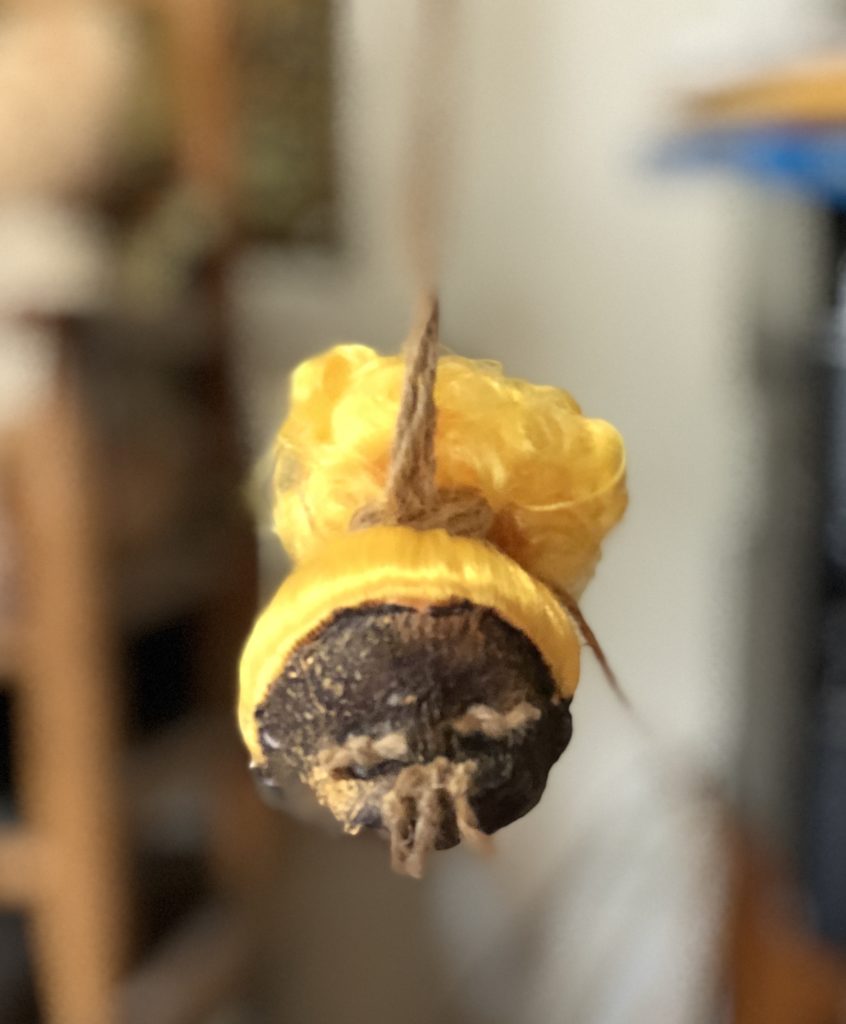
- Once the doll head is covered in tissue brush another layer of Mod Podge over all the tissue is there are no dry areas. Hang from hair to dry, or set on edge of plate resting on hair so wet Mod Podge does not stick to other things.

- When the heads are completely dry use an Exacto Knife to trim any excess tissue around the hair line.
- Mix some Mod Podge and black craft paint at a 50/50 ratio on a paper plate. Paint the doll heads covering all the white tissue. Let dry.

- The dry head should not have any "white" showing but should also not be heavy black. Touch up and trim where needed.
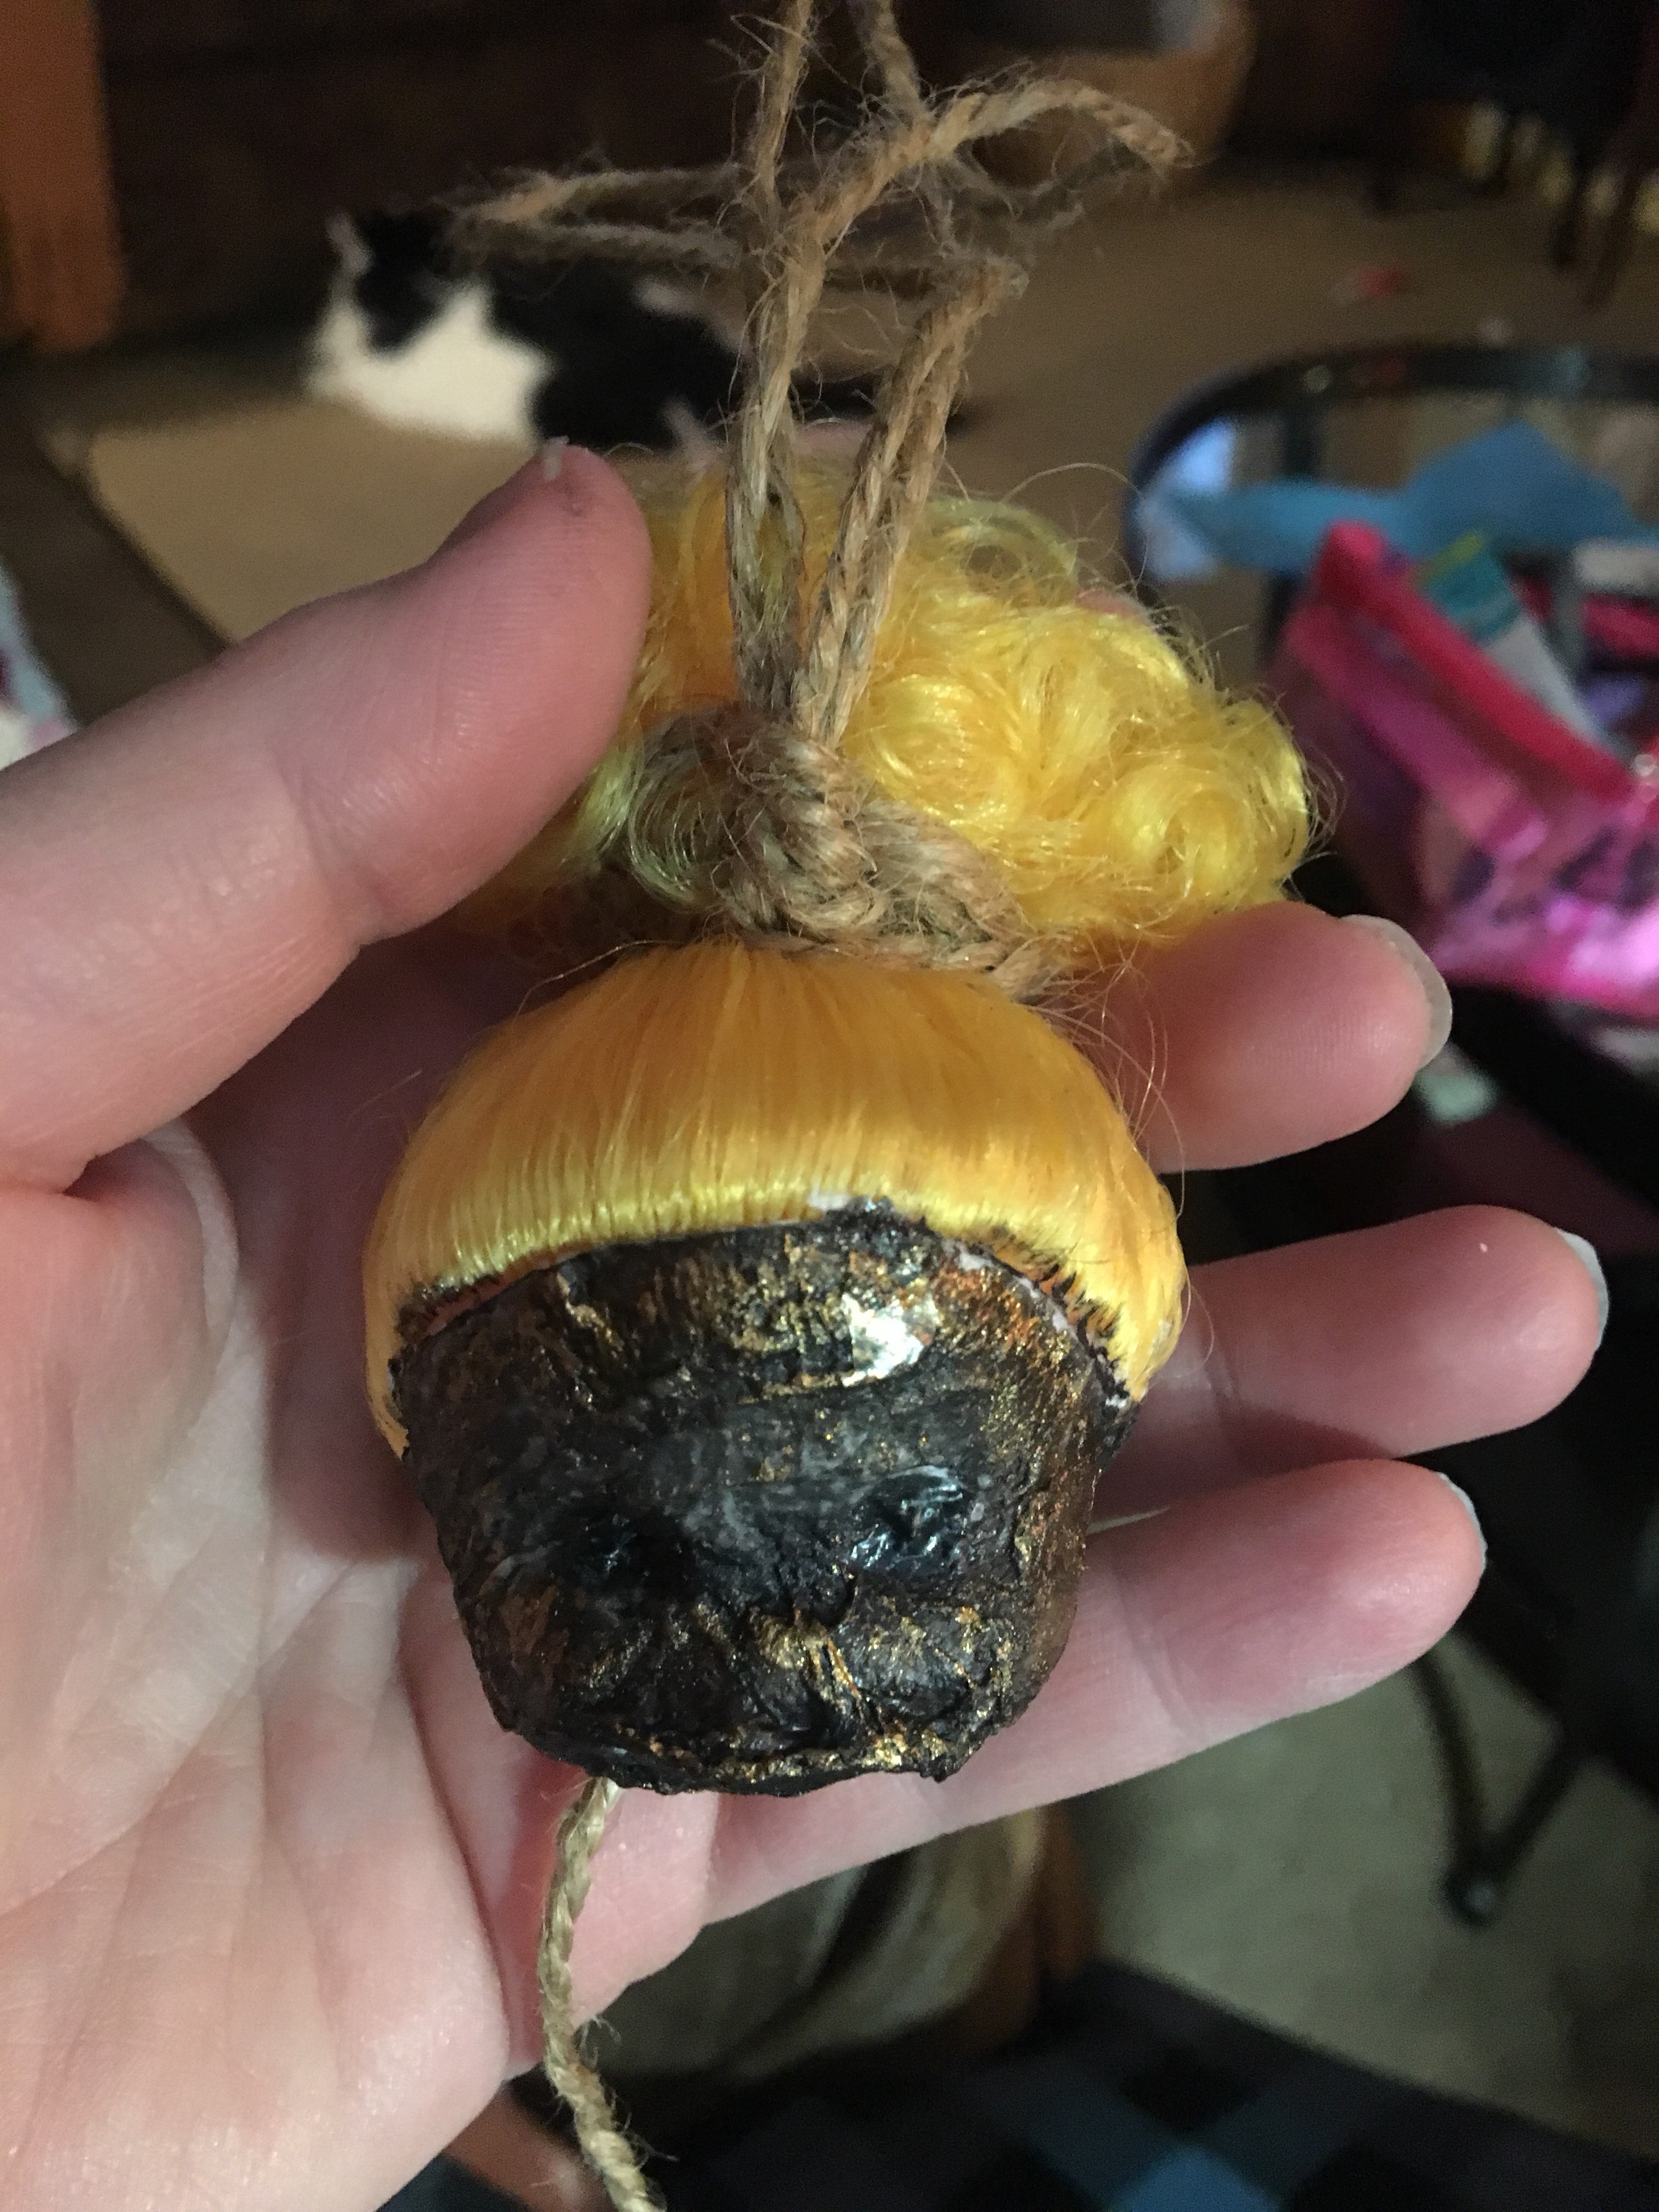
- Using a dry sponge brush lightly brush some metallic paint over the black areas so the black is still showing and the metallic is just highlighting the details to give your dead head some life.
- Tie enough jute twine to each pony tail so that the knot looks rustic and there is enough twine hanging to tie the group together later. About 18" of twine works but don't worry about making them all match.

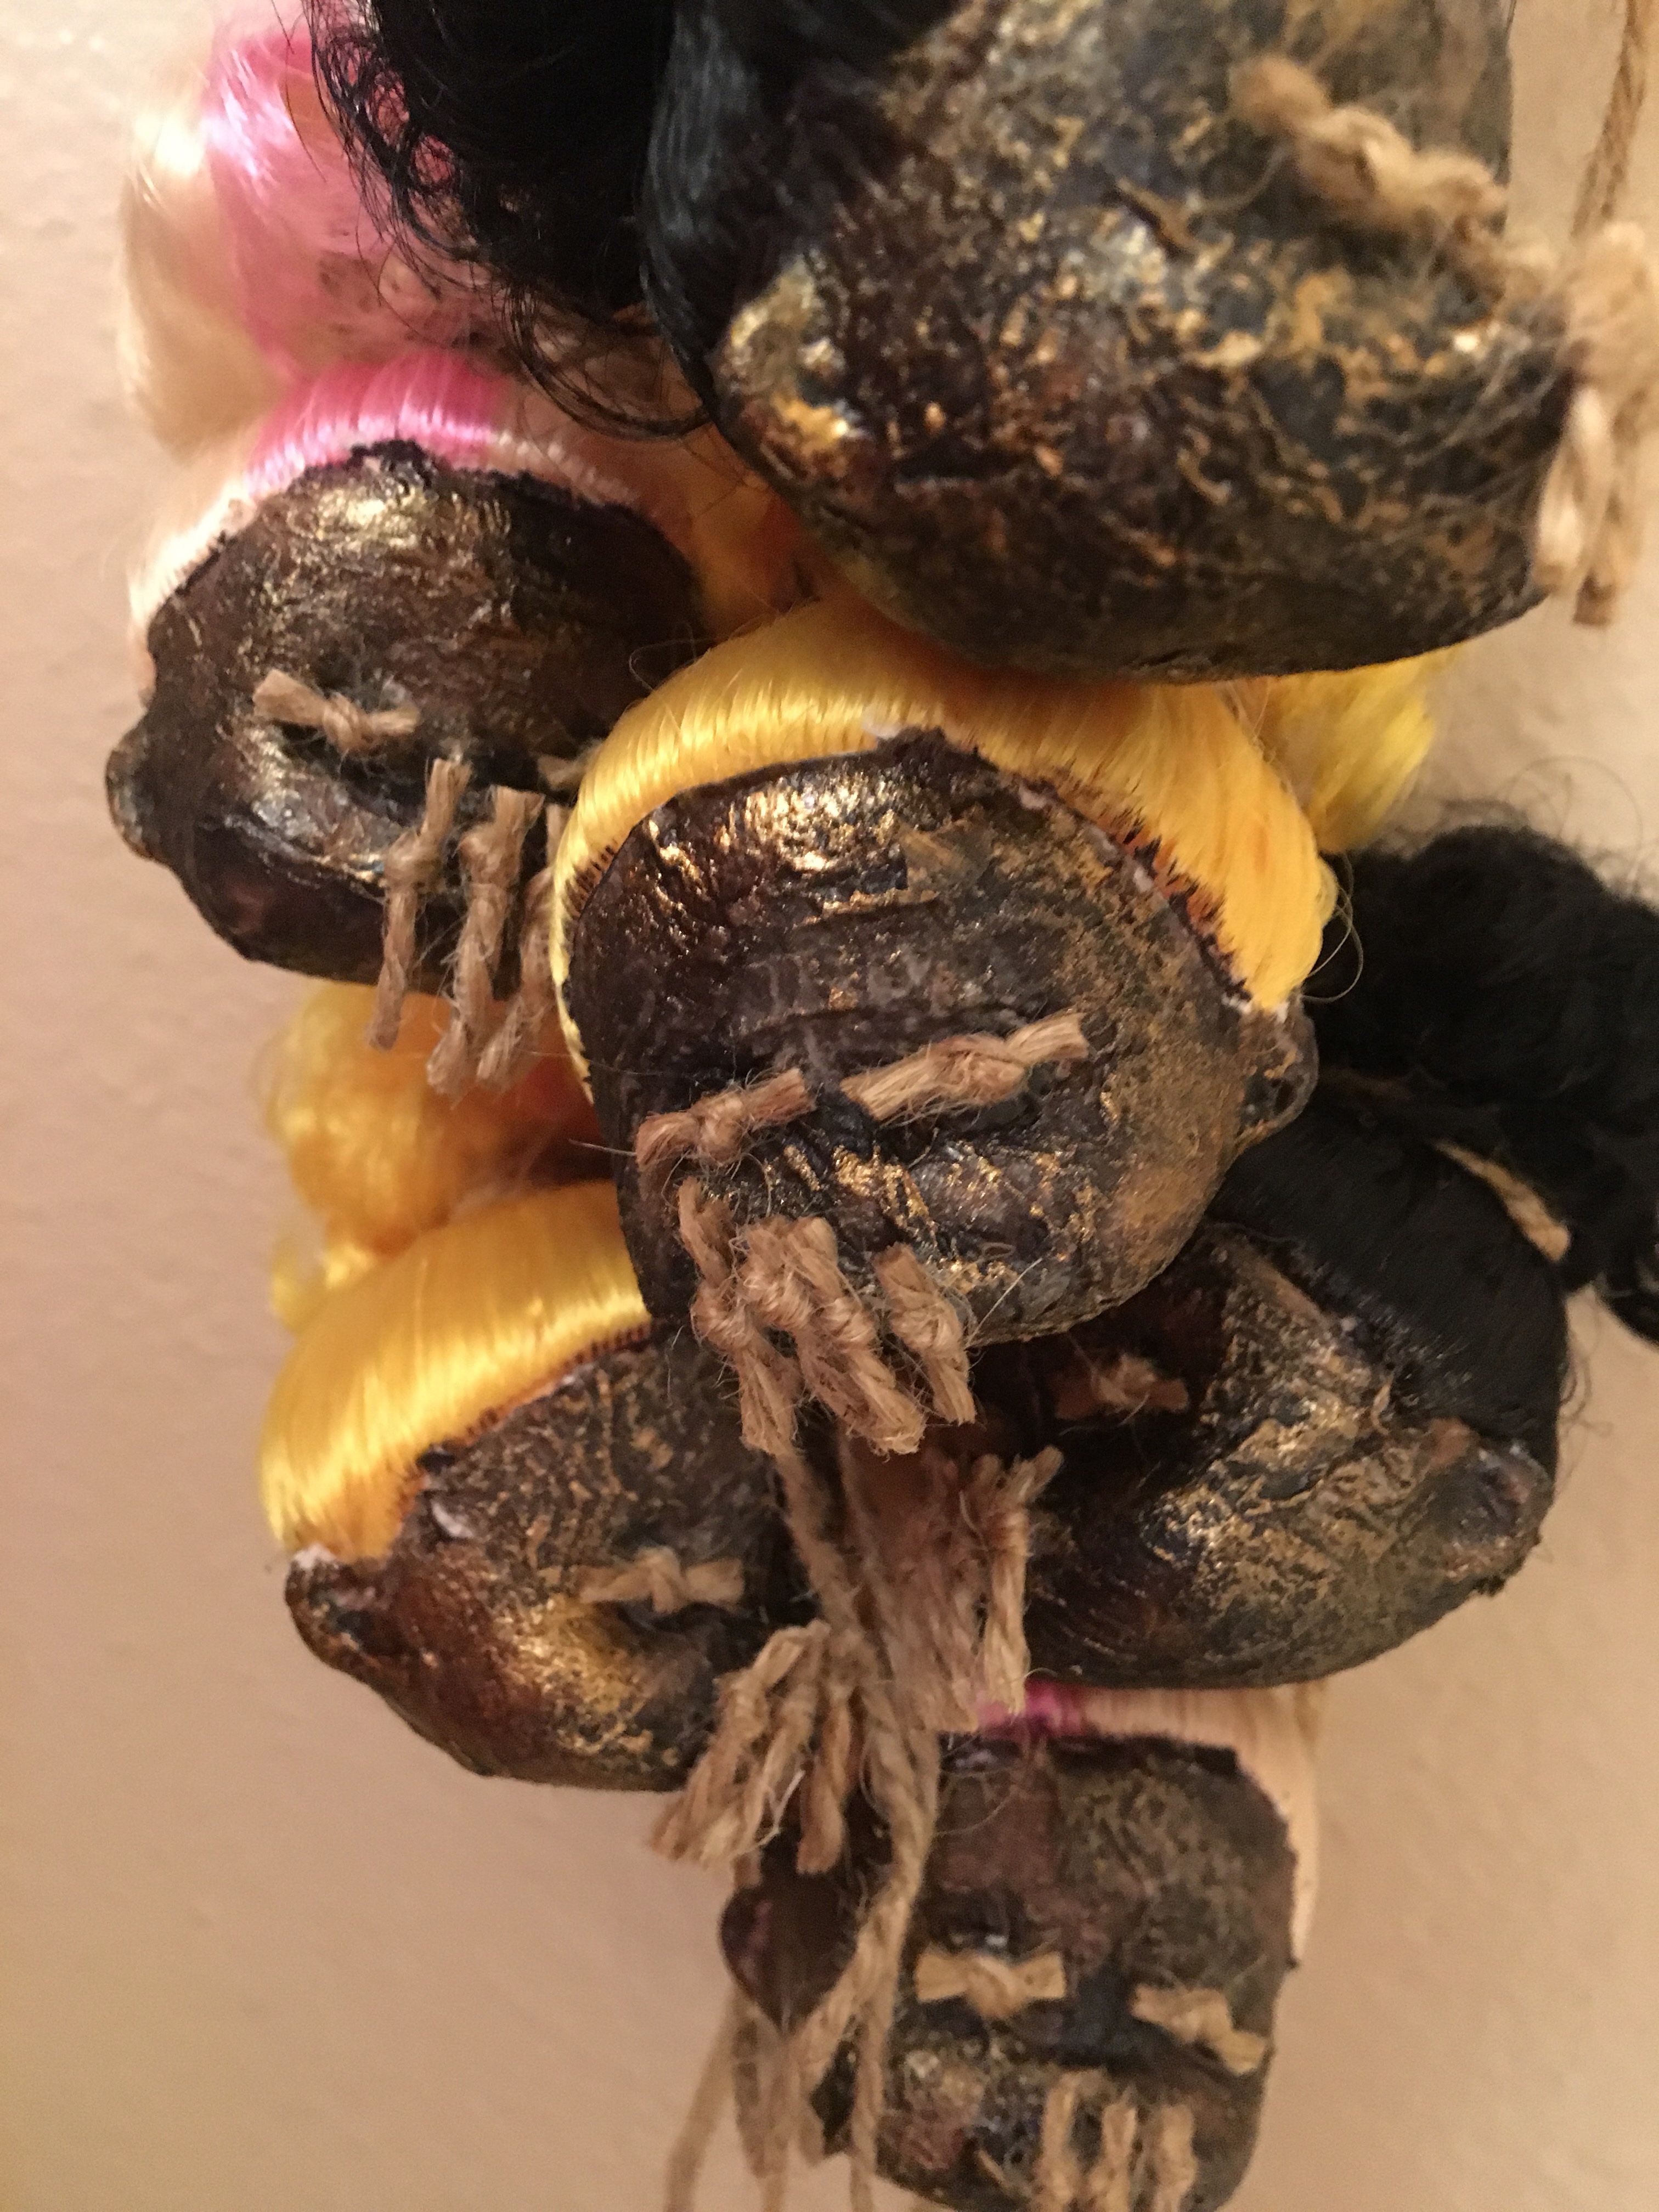
- Unravel a section of jute twine to make 5 thin pieces of jute with a knot for each head. I cut long sections and tied several knots then cut them appart. Leaving a little extra on each piece to trim to size later.
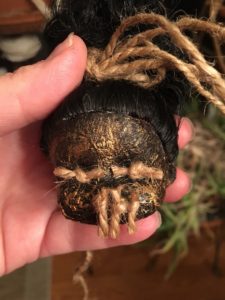
- Tacky glue a knot to each eye socket, and 3 knots to each doll's lips. Set asside to dry completely.
- Trim the eye and lip knots to desired lengths.
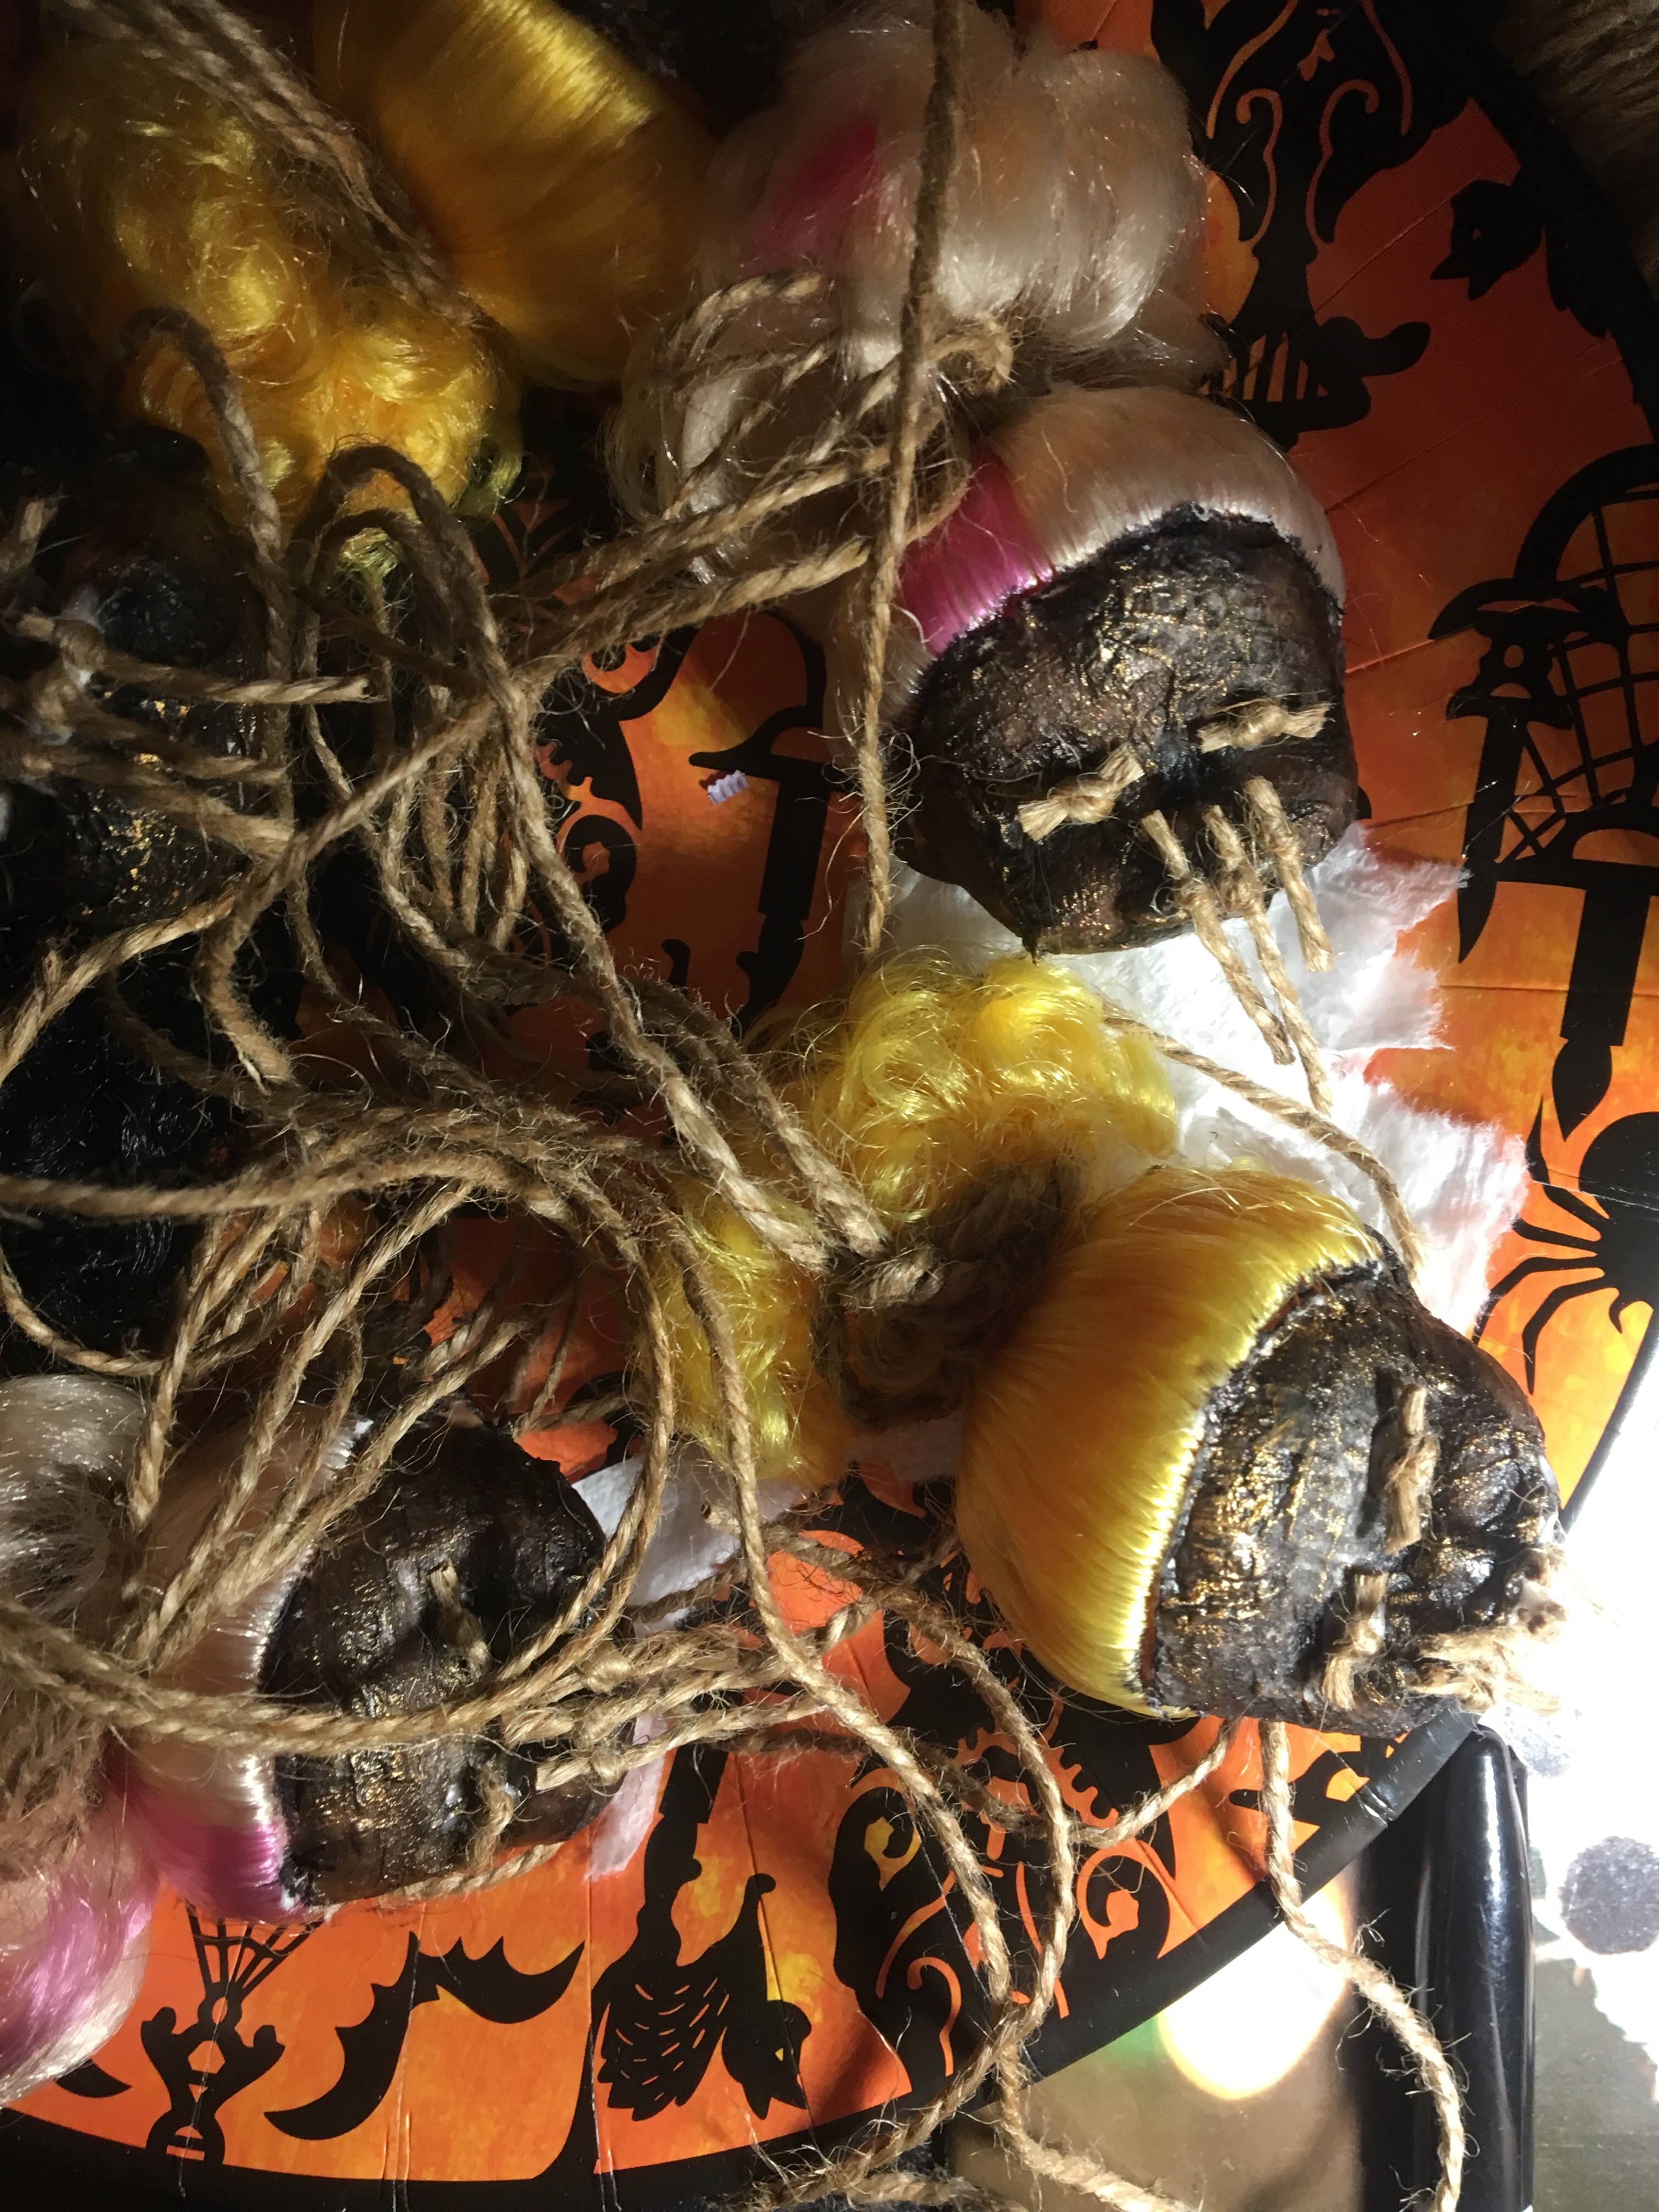
- Tie all the heads into a group with a simple knot so they can be untied if decorating needs change.


Notes

Mom, wife, computer geek, web designer, musician, board member, ski bum, bicyclist, camper, glamper, fishing woman, treasure hunter, bookkeeper, office wizard, blogger, vlogger, foodie, and Pampered Chef Independent Consultant, trekking through life in Jackson Hole, Wyoming