
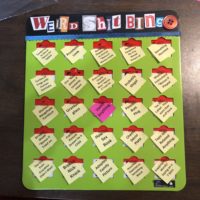
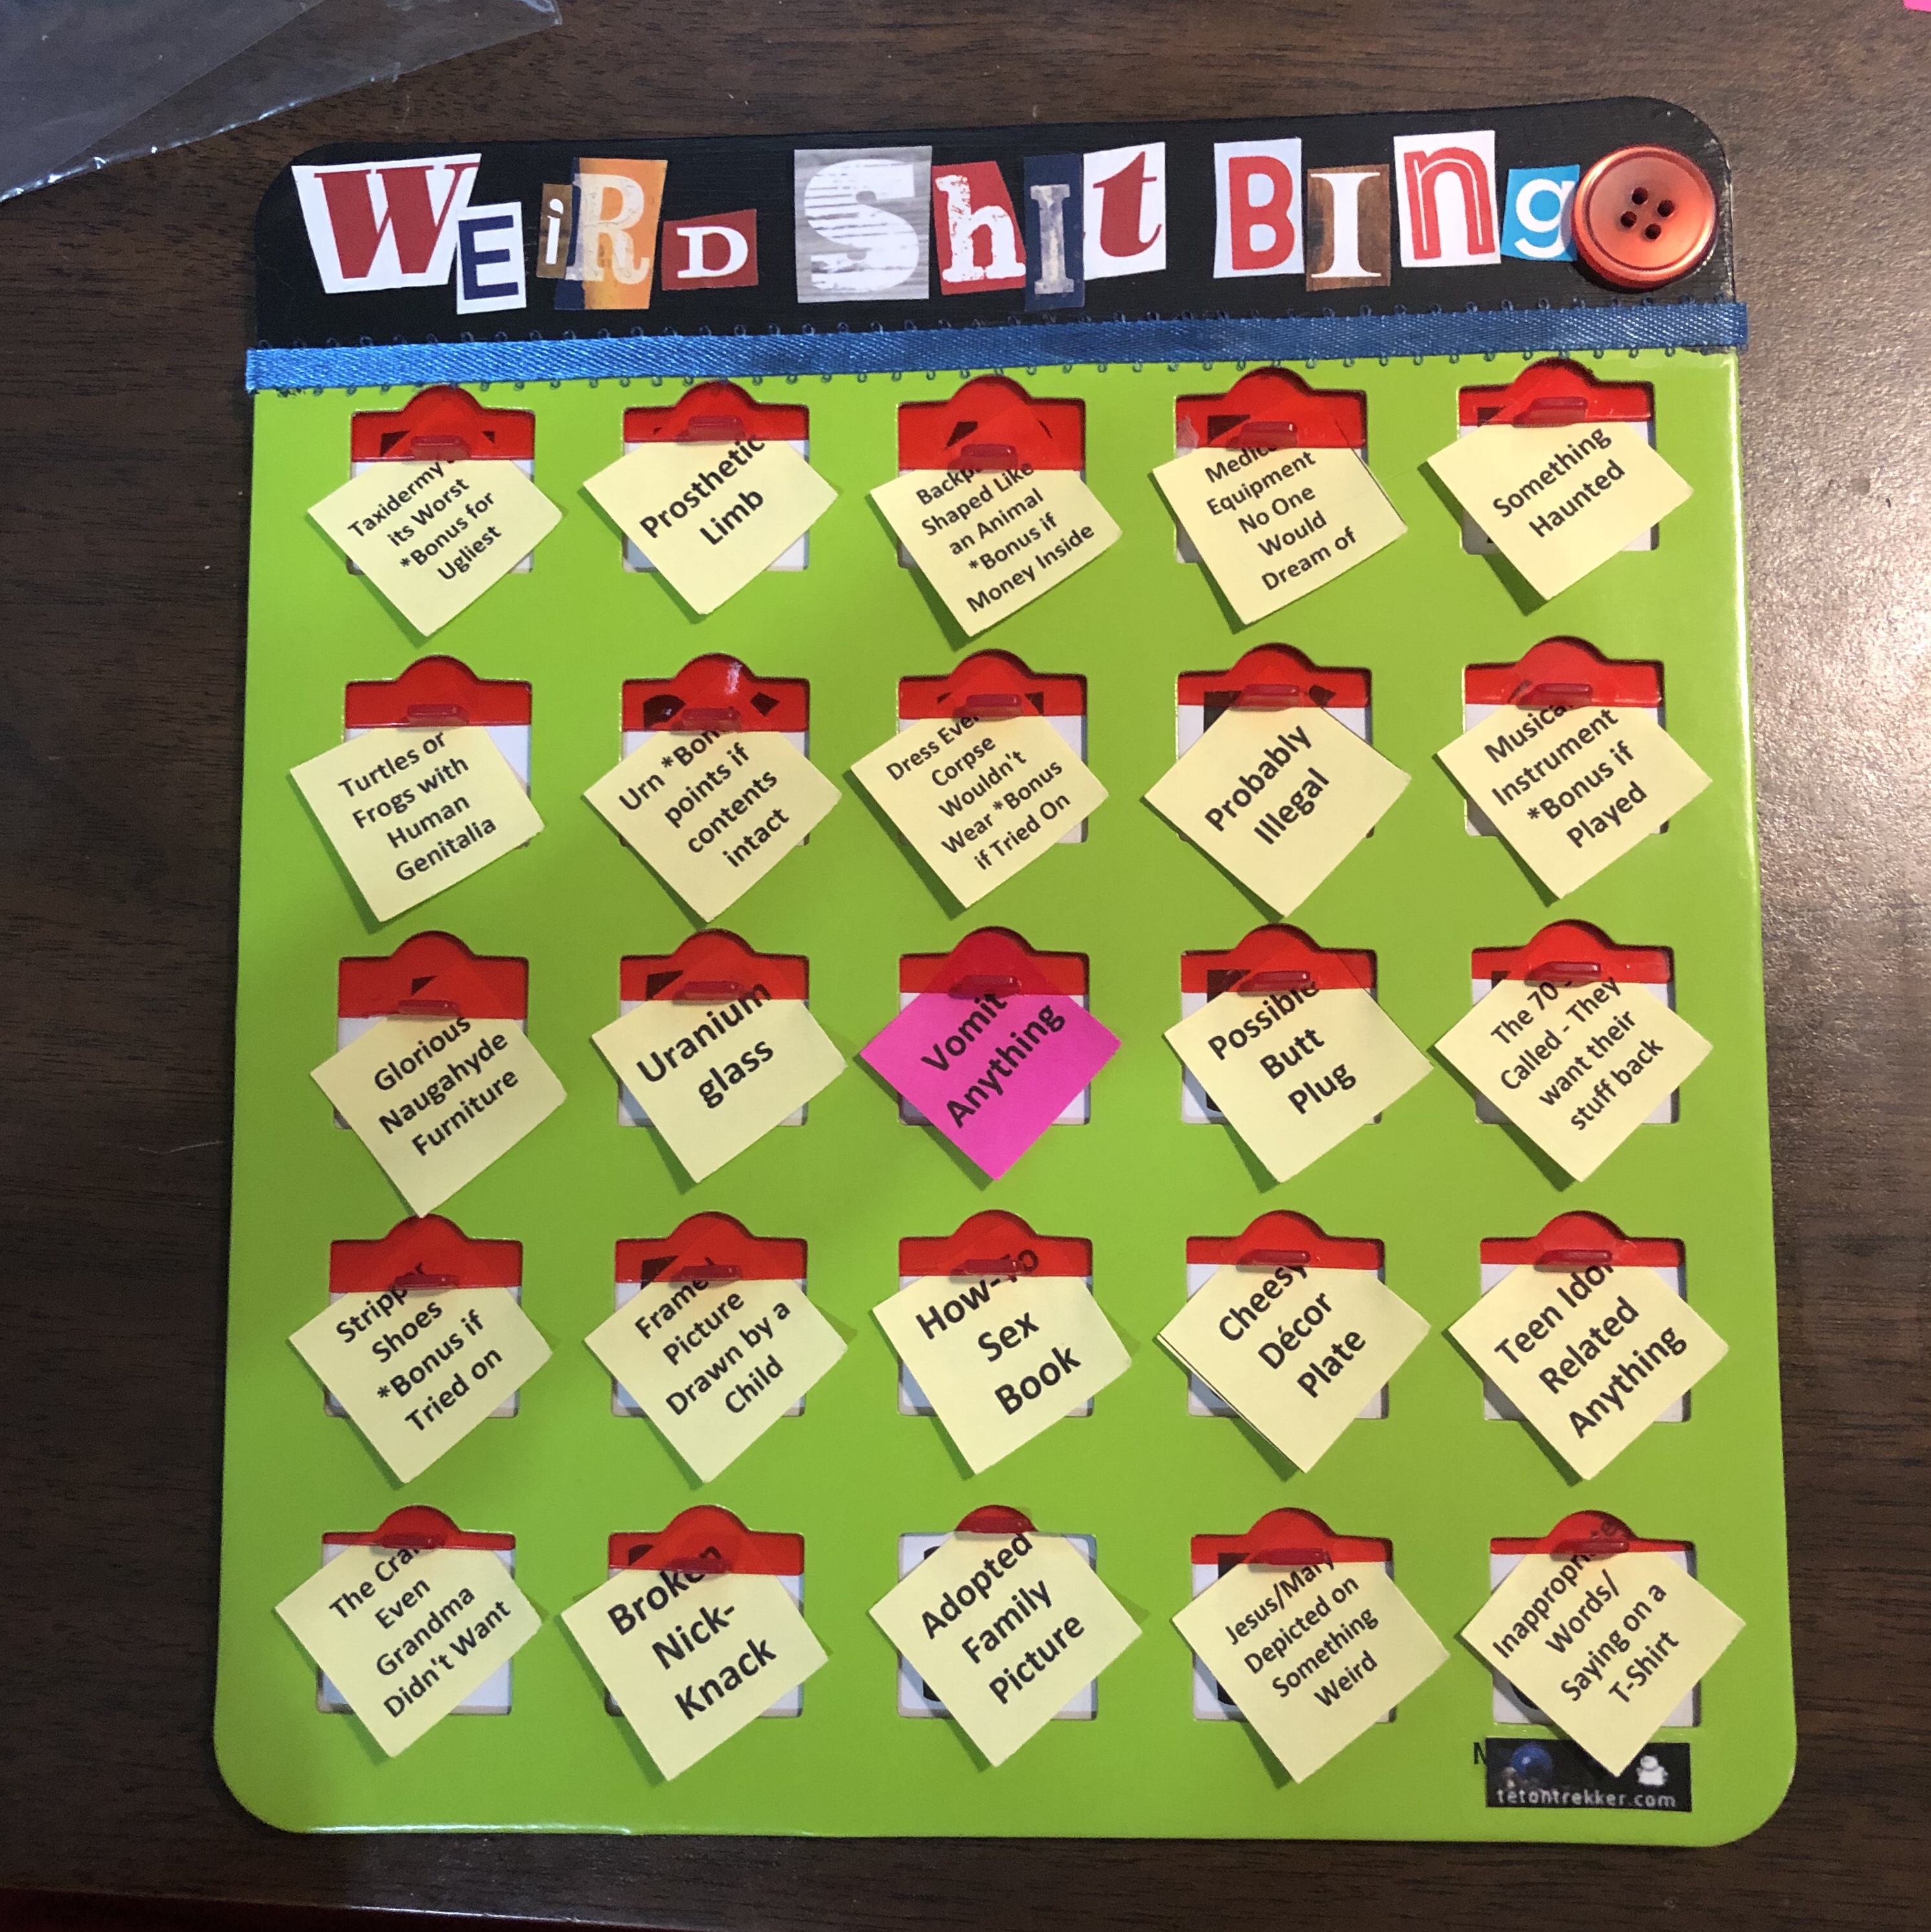
Weird S--- Bingo Cards
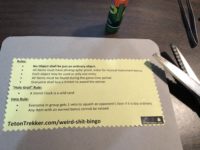
Weird Shit Bingo is a second hand item scavenger hunt. No need to purchase the objects you find, but photographic evidence is mandatory.
Servings: 10 Bingo Cards
Cost: About $3 per Card
Equipment
- Brush for Mod Podge
- Sponge type paint brush
- Scissors
- Pinking Shears
- Exacto Knife
- 1" Square paper punch
- Craft Tweezers
Ingredients
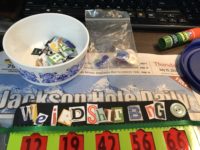
- 10 MR CHIPS Bingo Cards Slide Shutter for Senior and Kids - Jumbo
https://amzn.to/32QZc67 - Mod Podge
- Tacky Glue (Craft Glue)
- 1 Glue Stick
- 1 or 2 Old Magazines You will be cutting letters from them
- Black Craft Paint
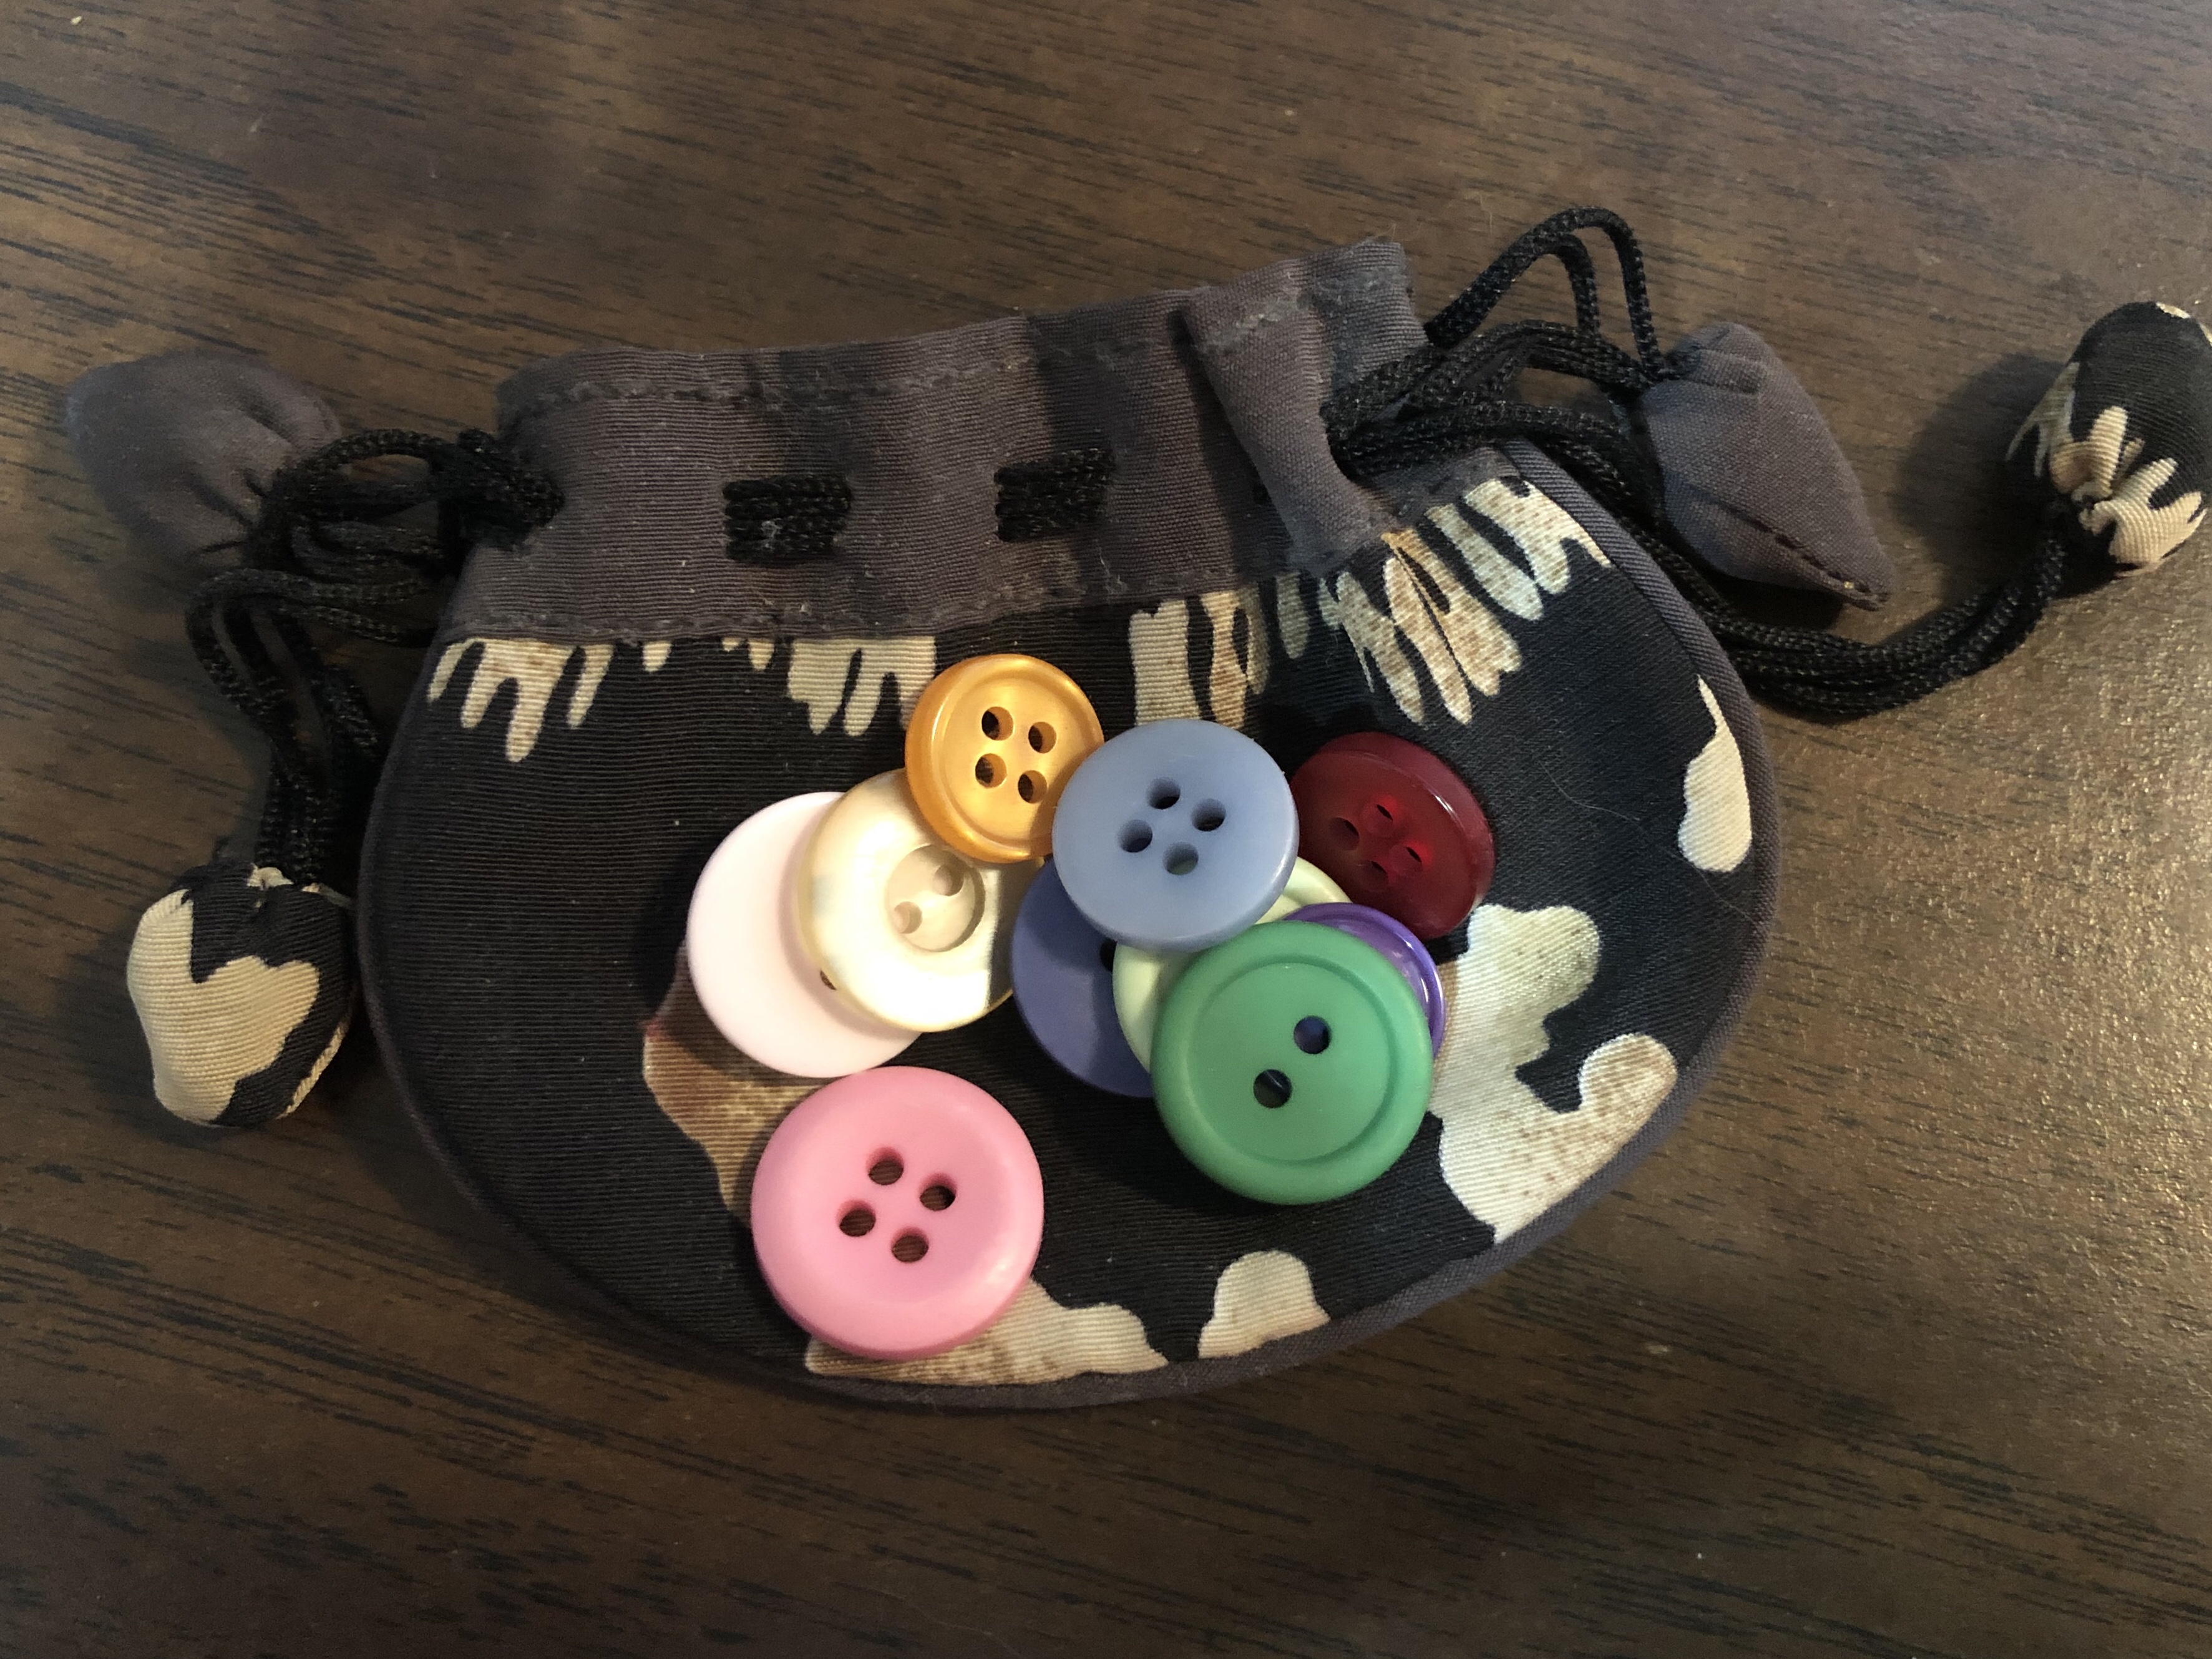
- 10 Assorted Buttons Each a different color
- 10 Pieces Fabirc Ribbon Assorted colors, cut slightly longer than the bingo card is wide.
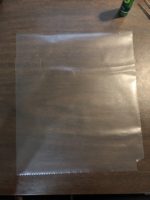
- 1 to 2 Rolls Clear Stick on Shelf Paper Need 18" x 1.5 yd
Printed Materials
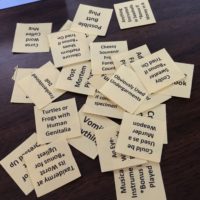
- 1 set Weird Shit Bingo PDF Cards
https://www.etsy.com/shop/TetonTrekker
Instructions
Painting the Cards
- Using a dry sponge brush carefully paint the top of the card with black craft paint to cover the words, making a straight line across the top. (Later the line will be covered by a ribbon to give it a finished look.)
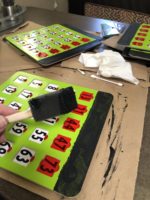
- Let completely dry then add a second coat. If some of the green is still showing through, let completely dry then add another coat.

Back of Card
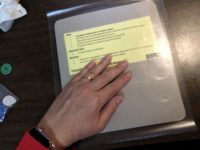
- Cut the rules from the bottom of the printed PDF card.
- Trim edges of the rules with pinking shears.
- Use glue stick on edges of the paper rules then stick it onto the back of the bingo card.
- For each card, cut a piece of the clear shelf paper a bit larger than the card.
- Apply the glue stick or Mod Podge to the edges of the back of the card, from edge to about a ½" in from edge, around the entire card.The glue stick dries faster but uses a lot of the stick per card.The Mod Podge is messier and takes longer to dry but the finished look is much nicer.
- Take the backing off the shelf paper and lay sticky side up on your table.
- Put the card, back down, onto the sticky side of shelf paper. Press down with your hands.
- Turn over and rub any bubbles out.
- When the glue/Mod Podge has dried trim the exposed edges off the shelf paper, using either the Exacto knife or scissors.


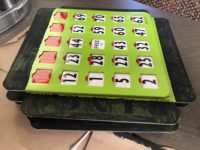
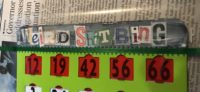
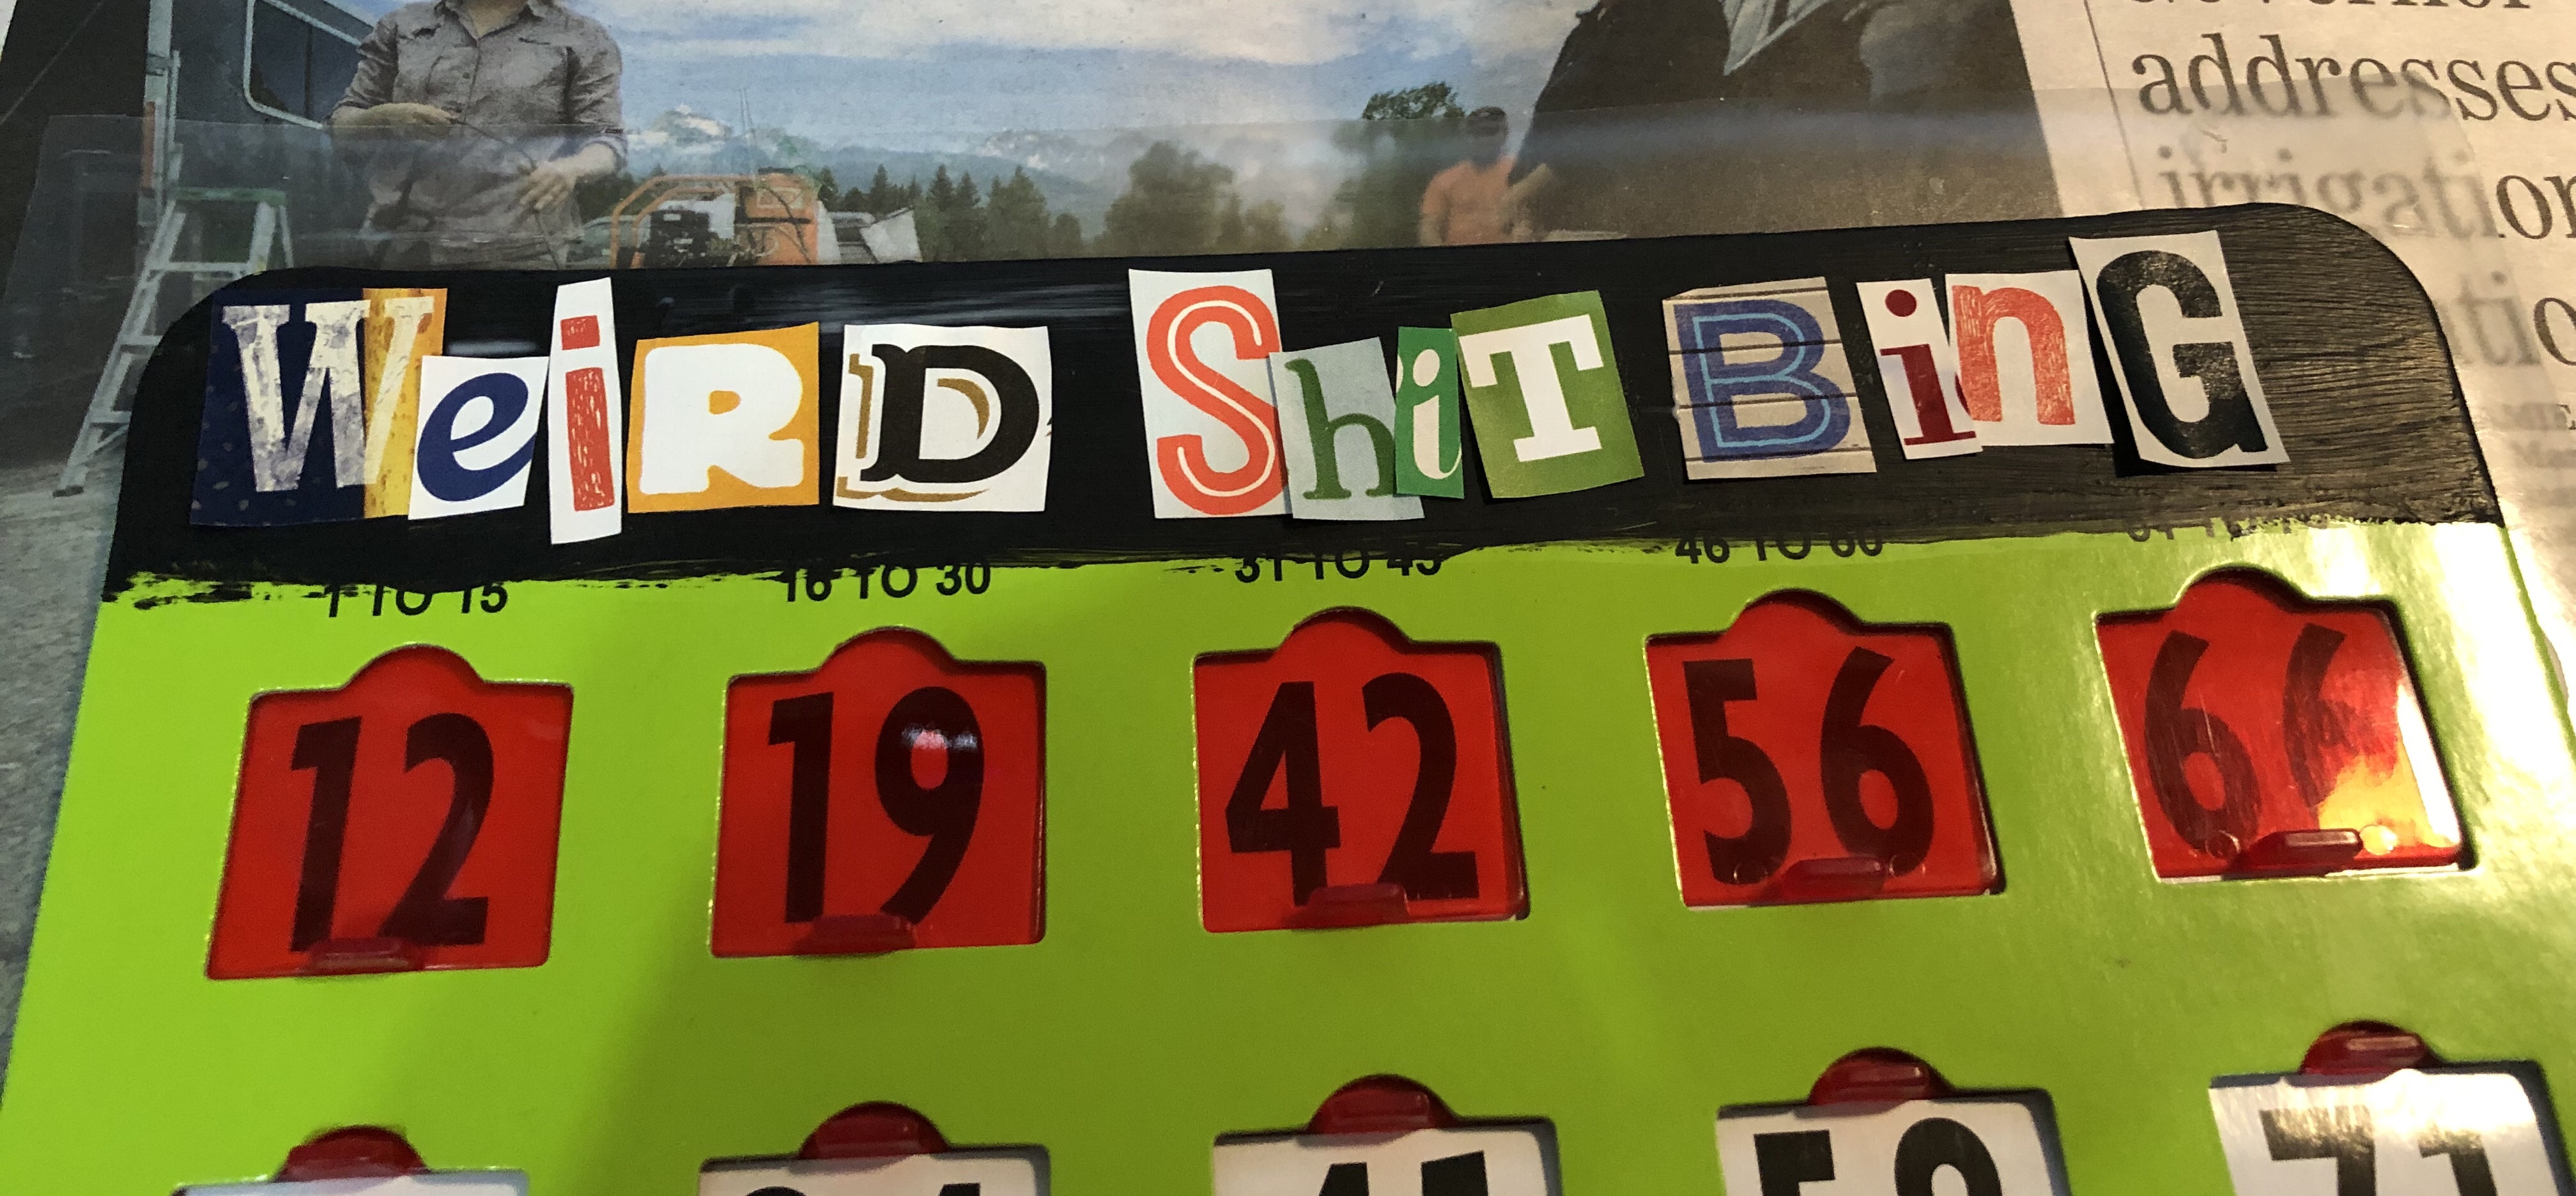
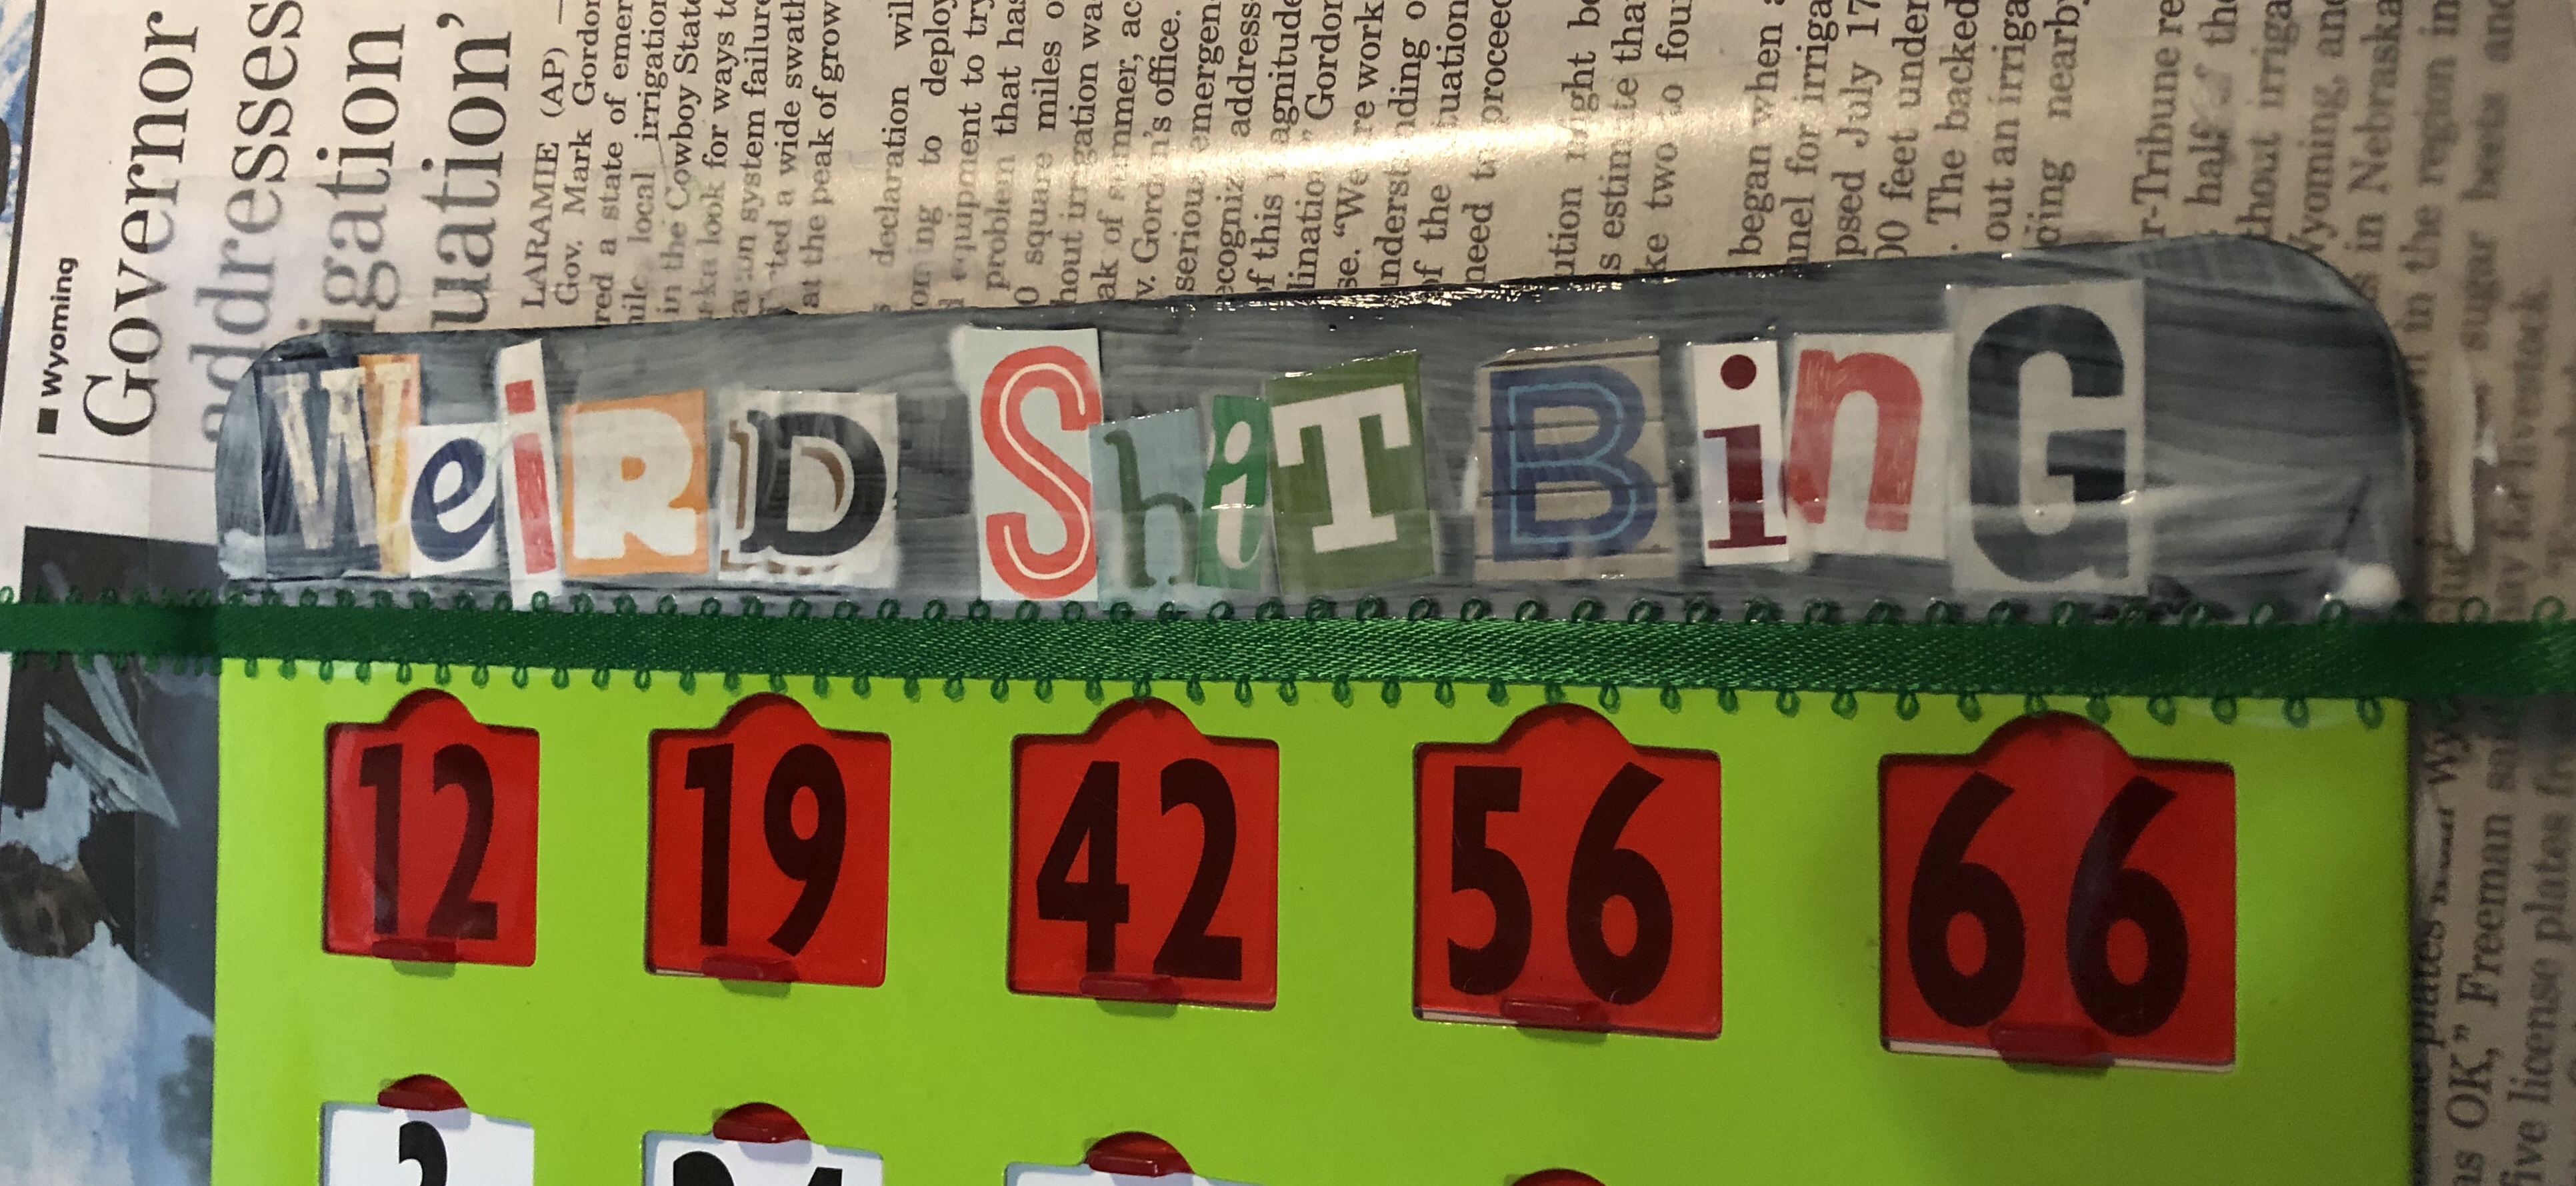
Game Title
- Lock your cat in out of the room for the rest of the project.
- Clip a piece of ribbon a bit longer than the card is wide and lay it out over the paint line. (do NOT glue down yet.)
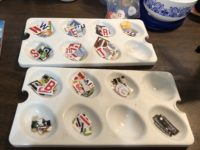
- Cut enough letters from the magazine to spell "WEIRD SHIT BING" for each card, the buttons will be the "O". Letters should fit between ribbon and top of card but be random in font.I found it handy to sort them in a deviled egg rack.
- Lay out the letters using, a button for the O, across top of card for your desired look.
- Set the letters, ribbon, and button aside.
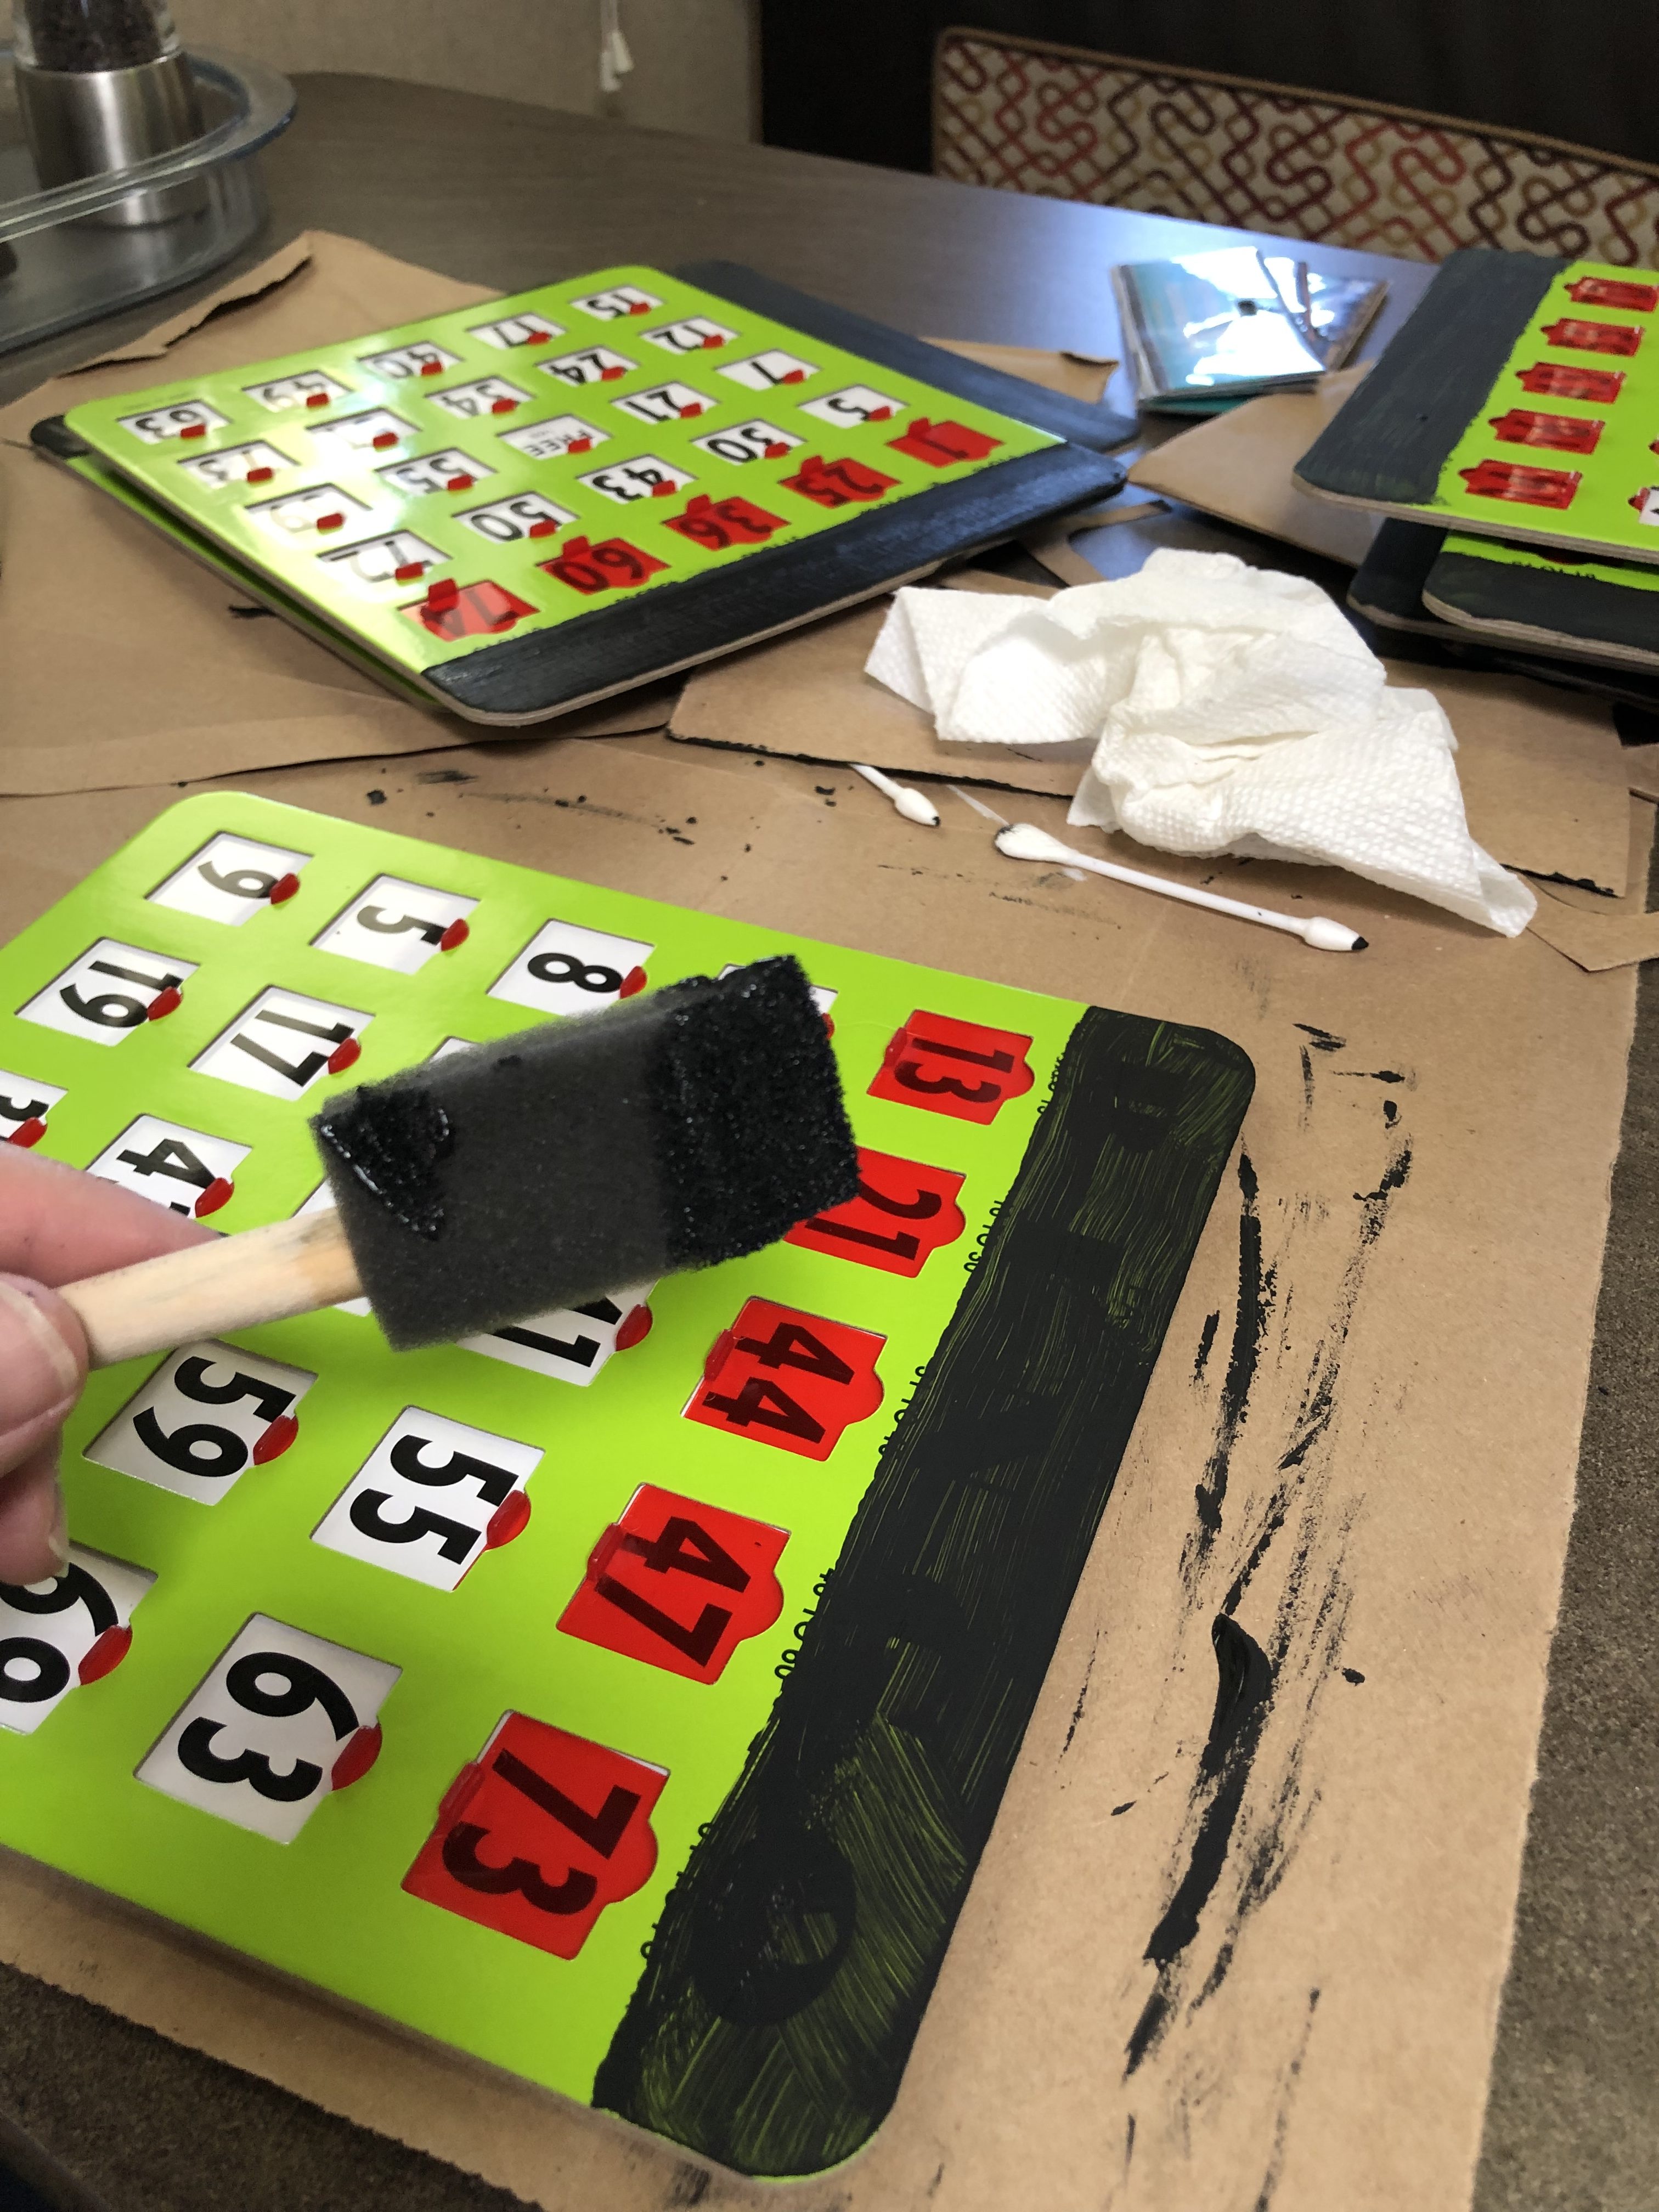
- Brush a think coart of Mod Podge over the painted area and about a ¼" over the line where the ribbon will go.
- Place the letters back in their positions. If you work fast and dont press the letters in the Mod Podge will allow you to move them a little until you get them just right.

- Gently press all the letters down so there are no bubbles and the edges are down.
- Cover with a medium coat of Modge Podge.
- Place ribbon in place and press into the Mod Podge.
- Let completely dry.
- Check with fingers that there are now loose edges. If needed add second coat of Mod Podge, careful not to cover ribbon, and let completely dry.
- Trim the ribbon edges.
- Glue the button into the "O" position with Tacky Glue.


Add the items to the Slots
- I highly recommend doing this part one card at at time.
- Do not mix up the tiles from one card to another, you will not have an even playing field.
- Be sure your hands are clean and dry while handling the tiles.
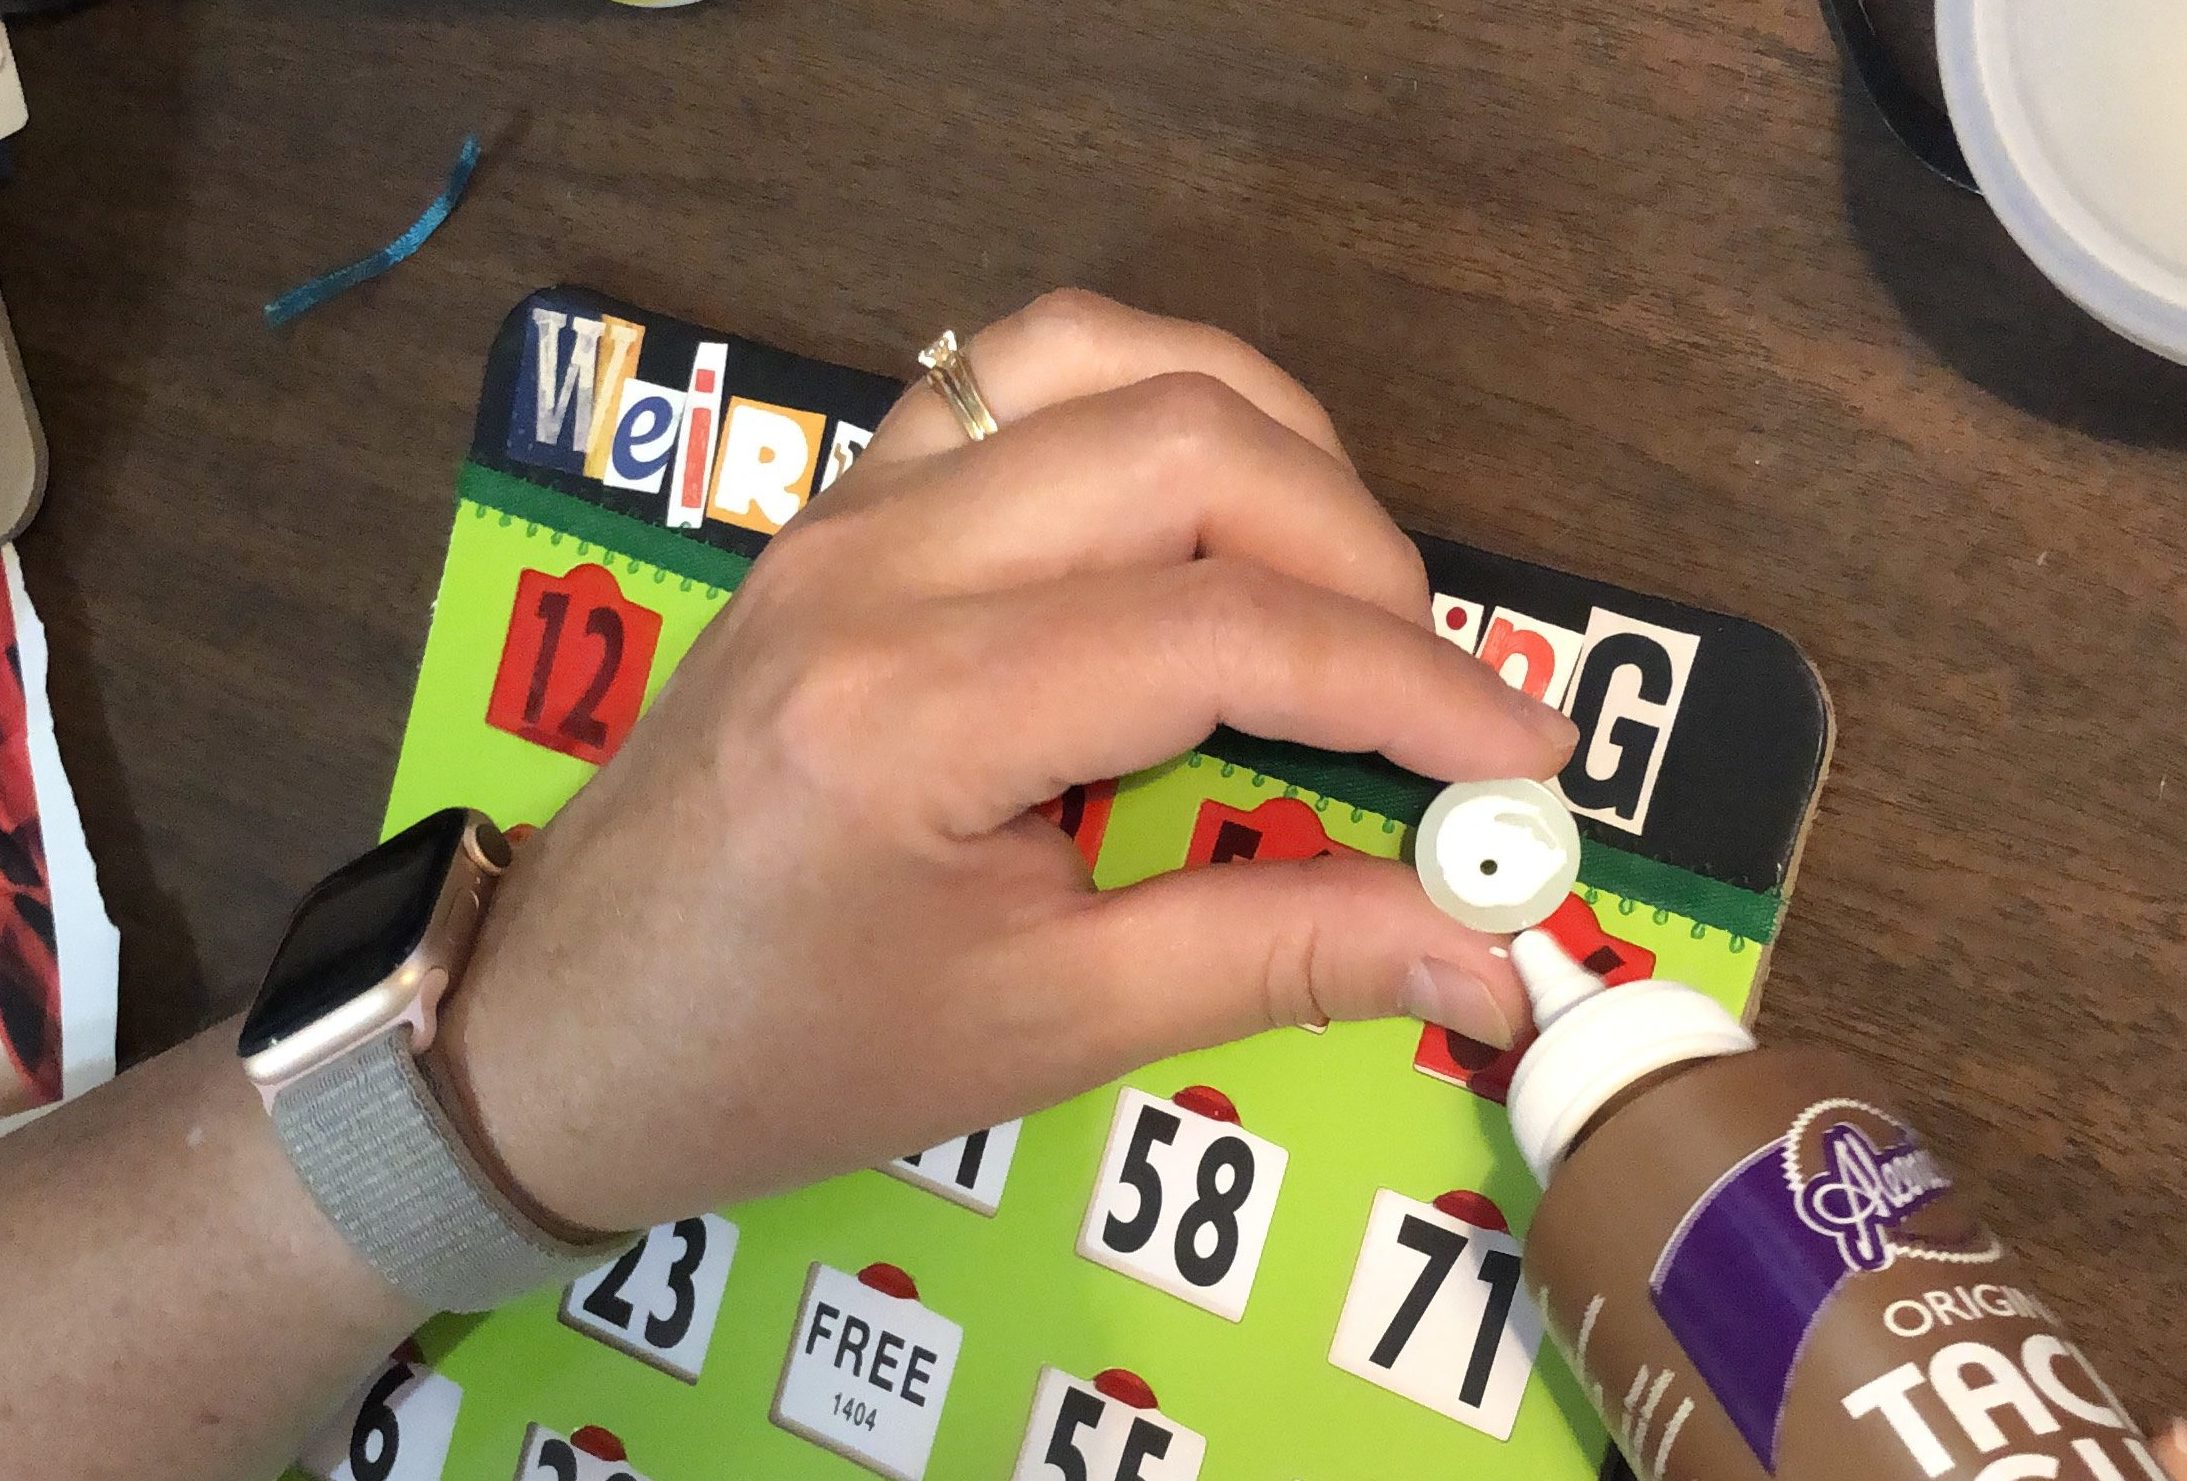
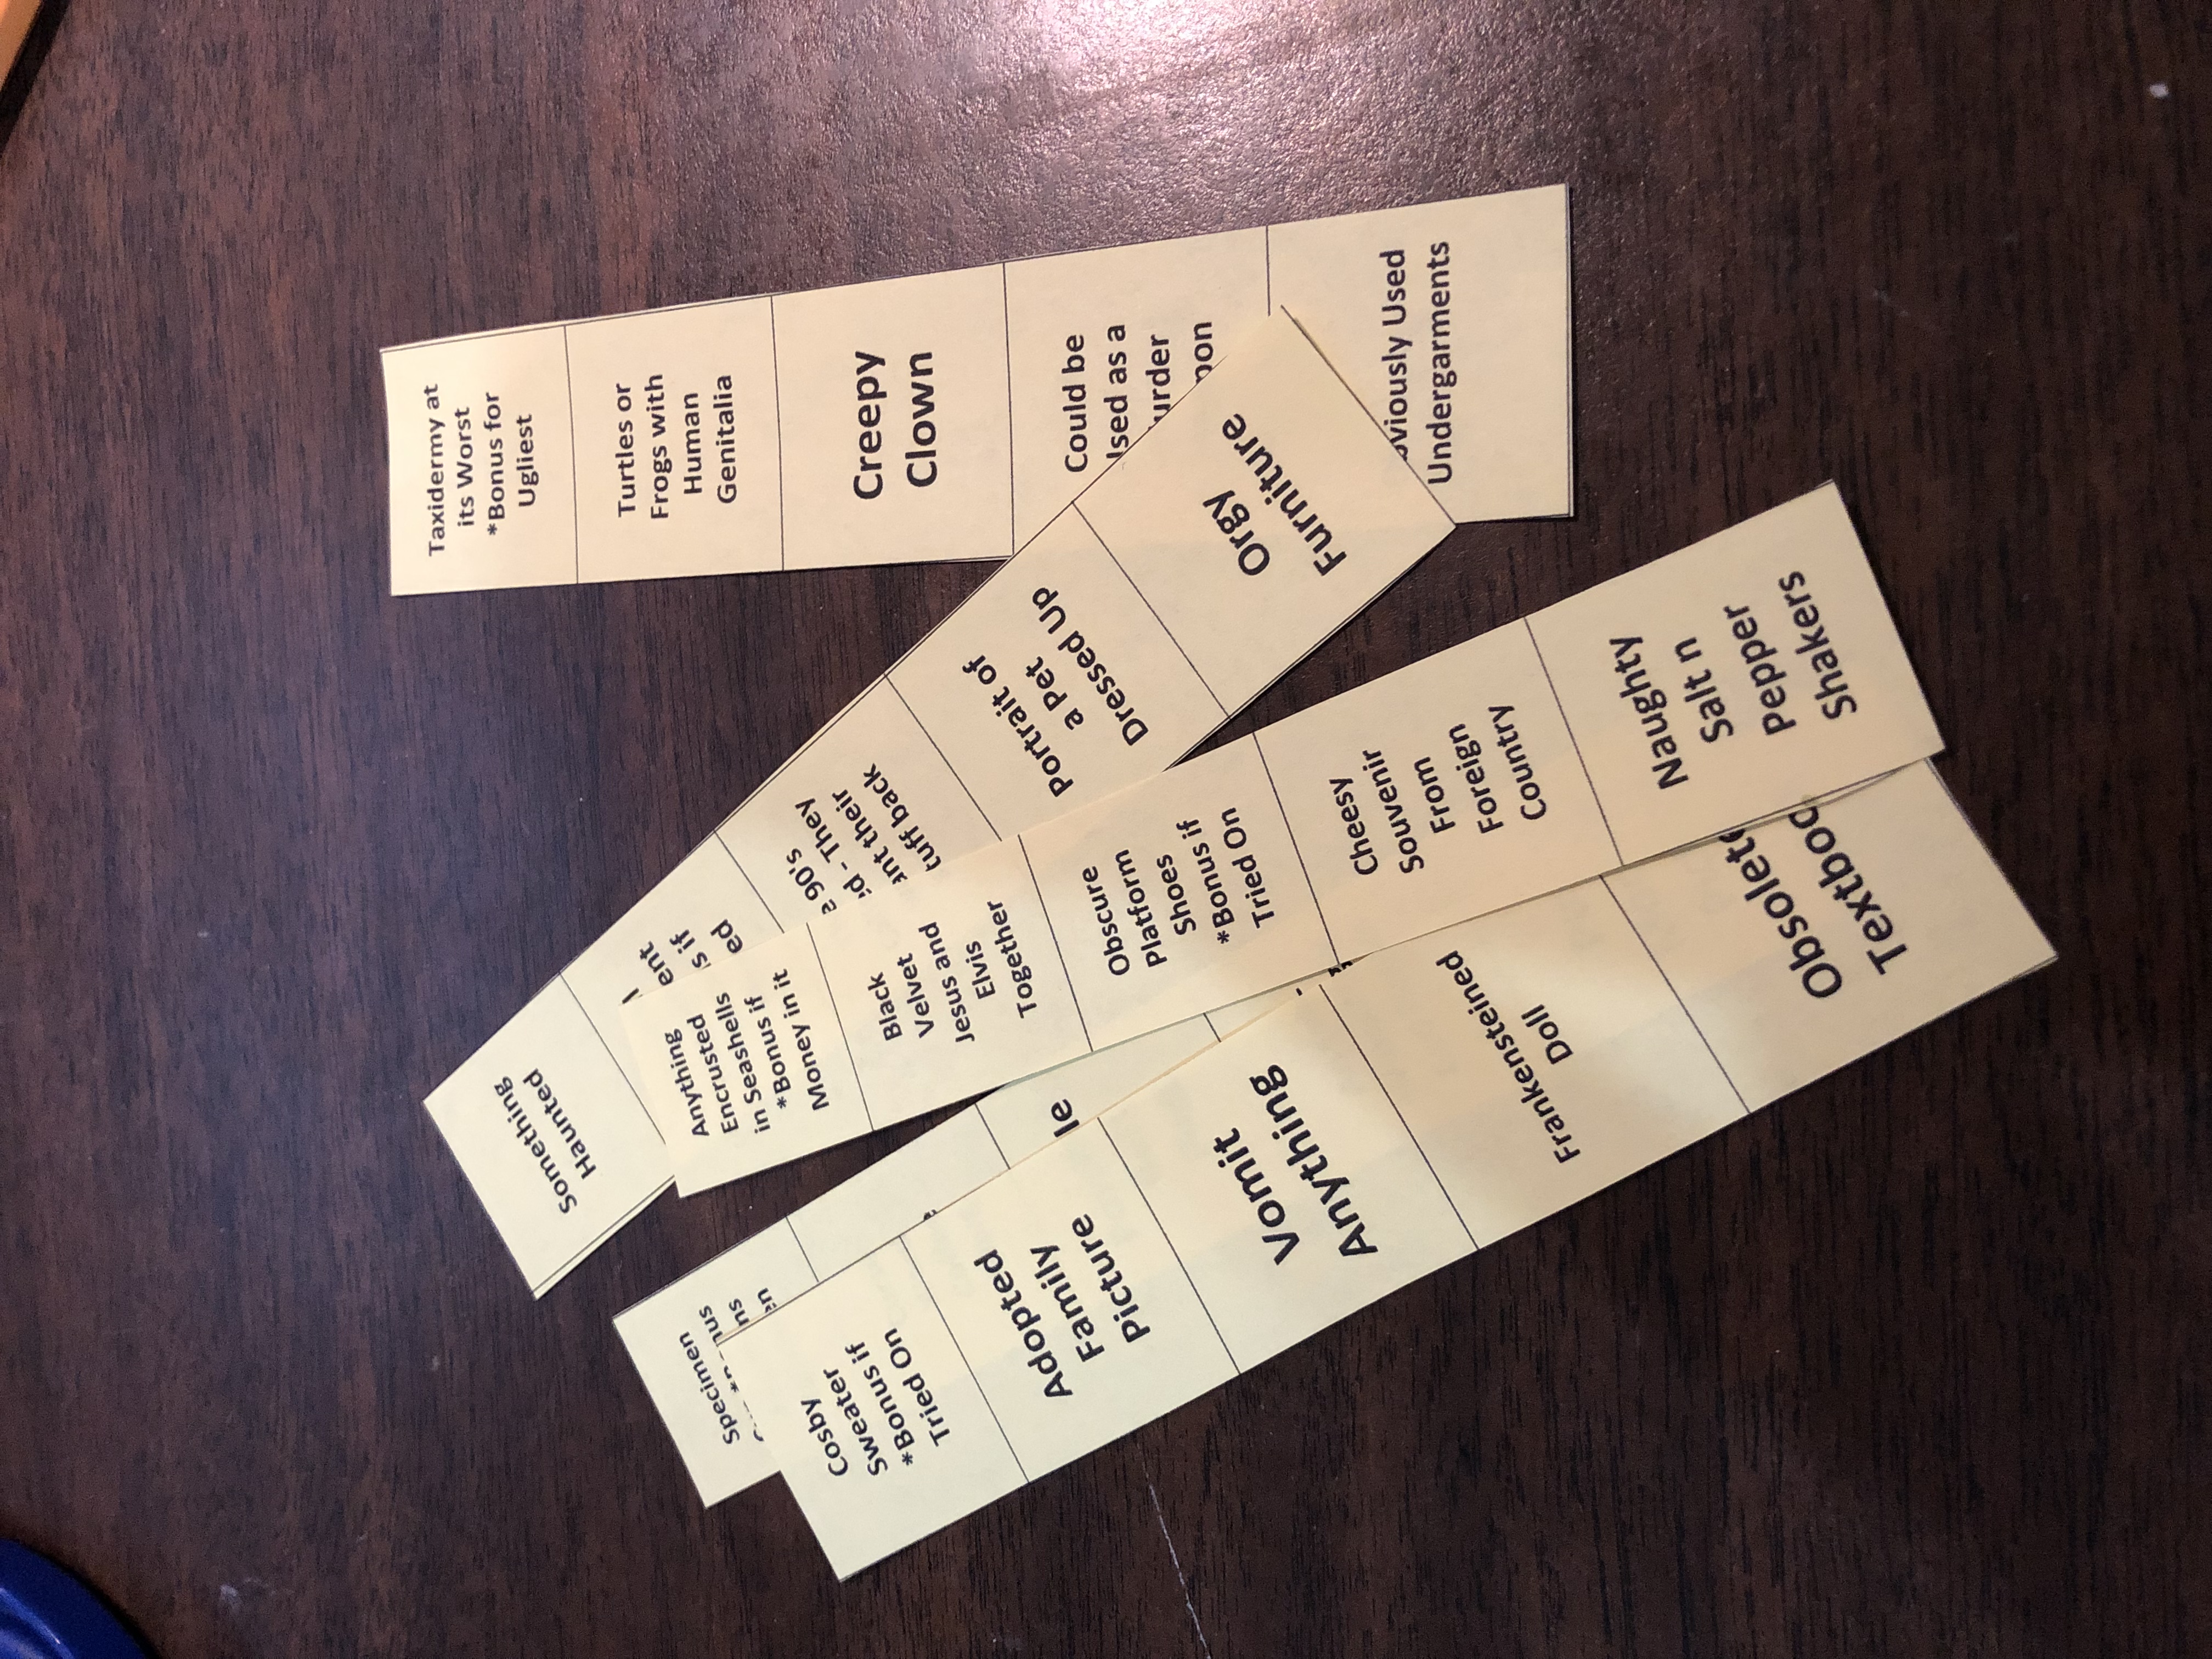
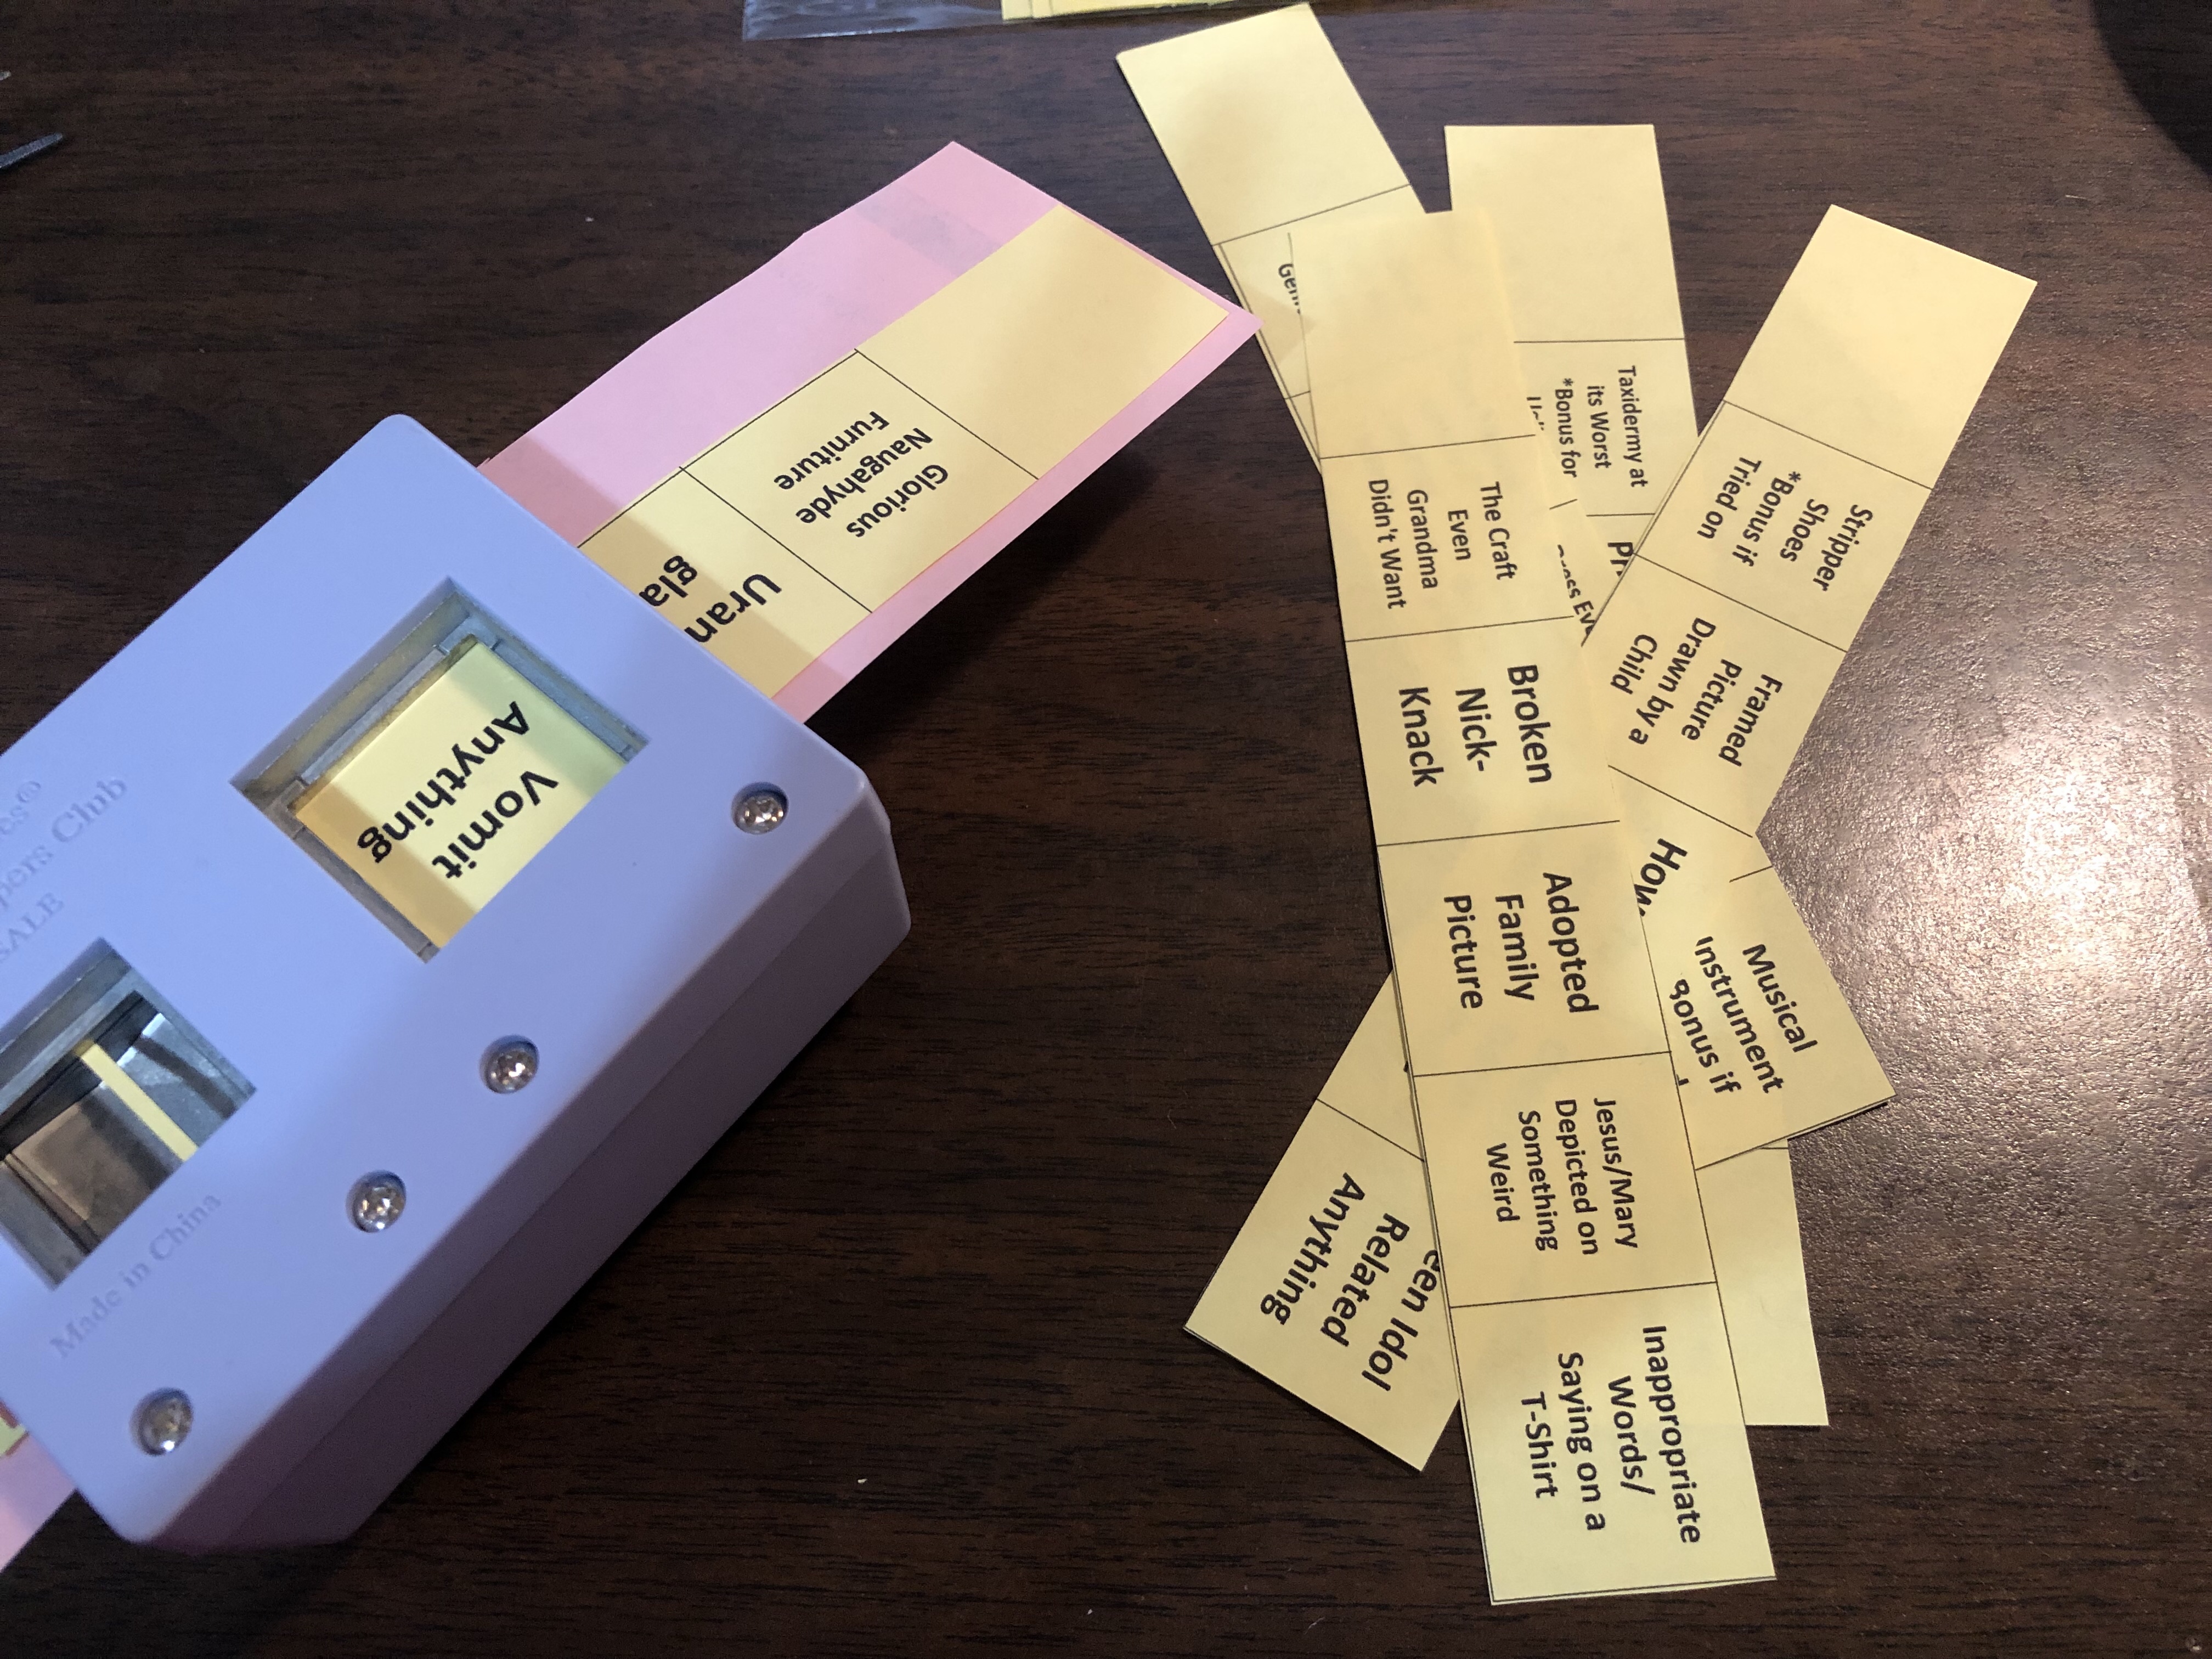
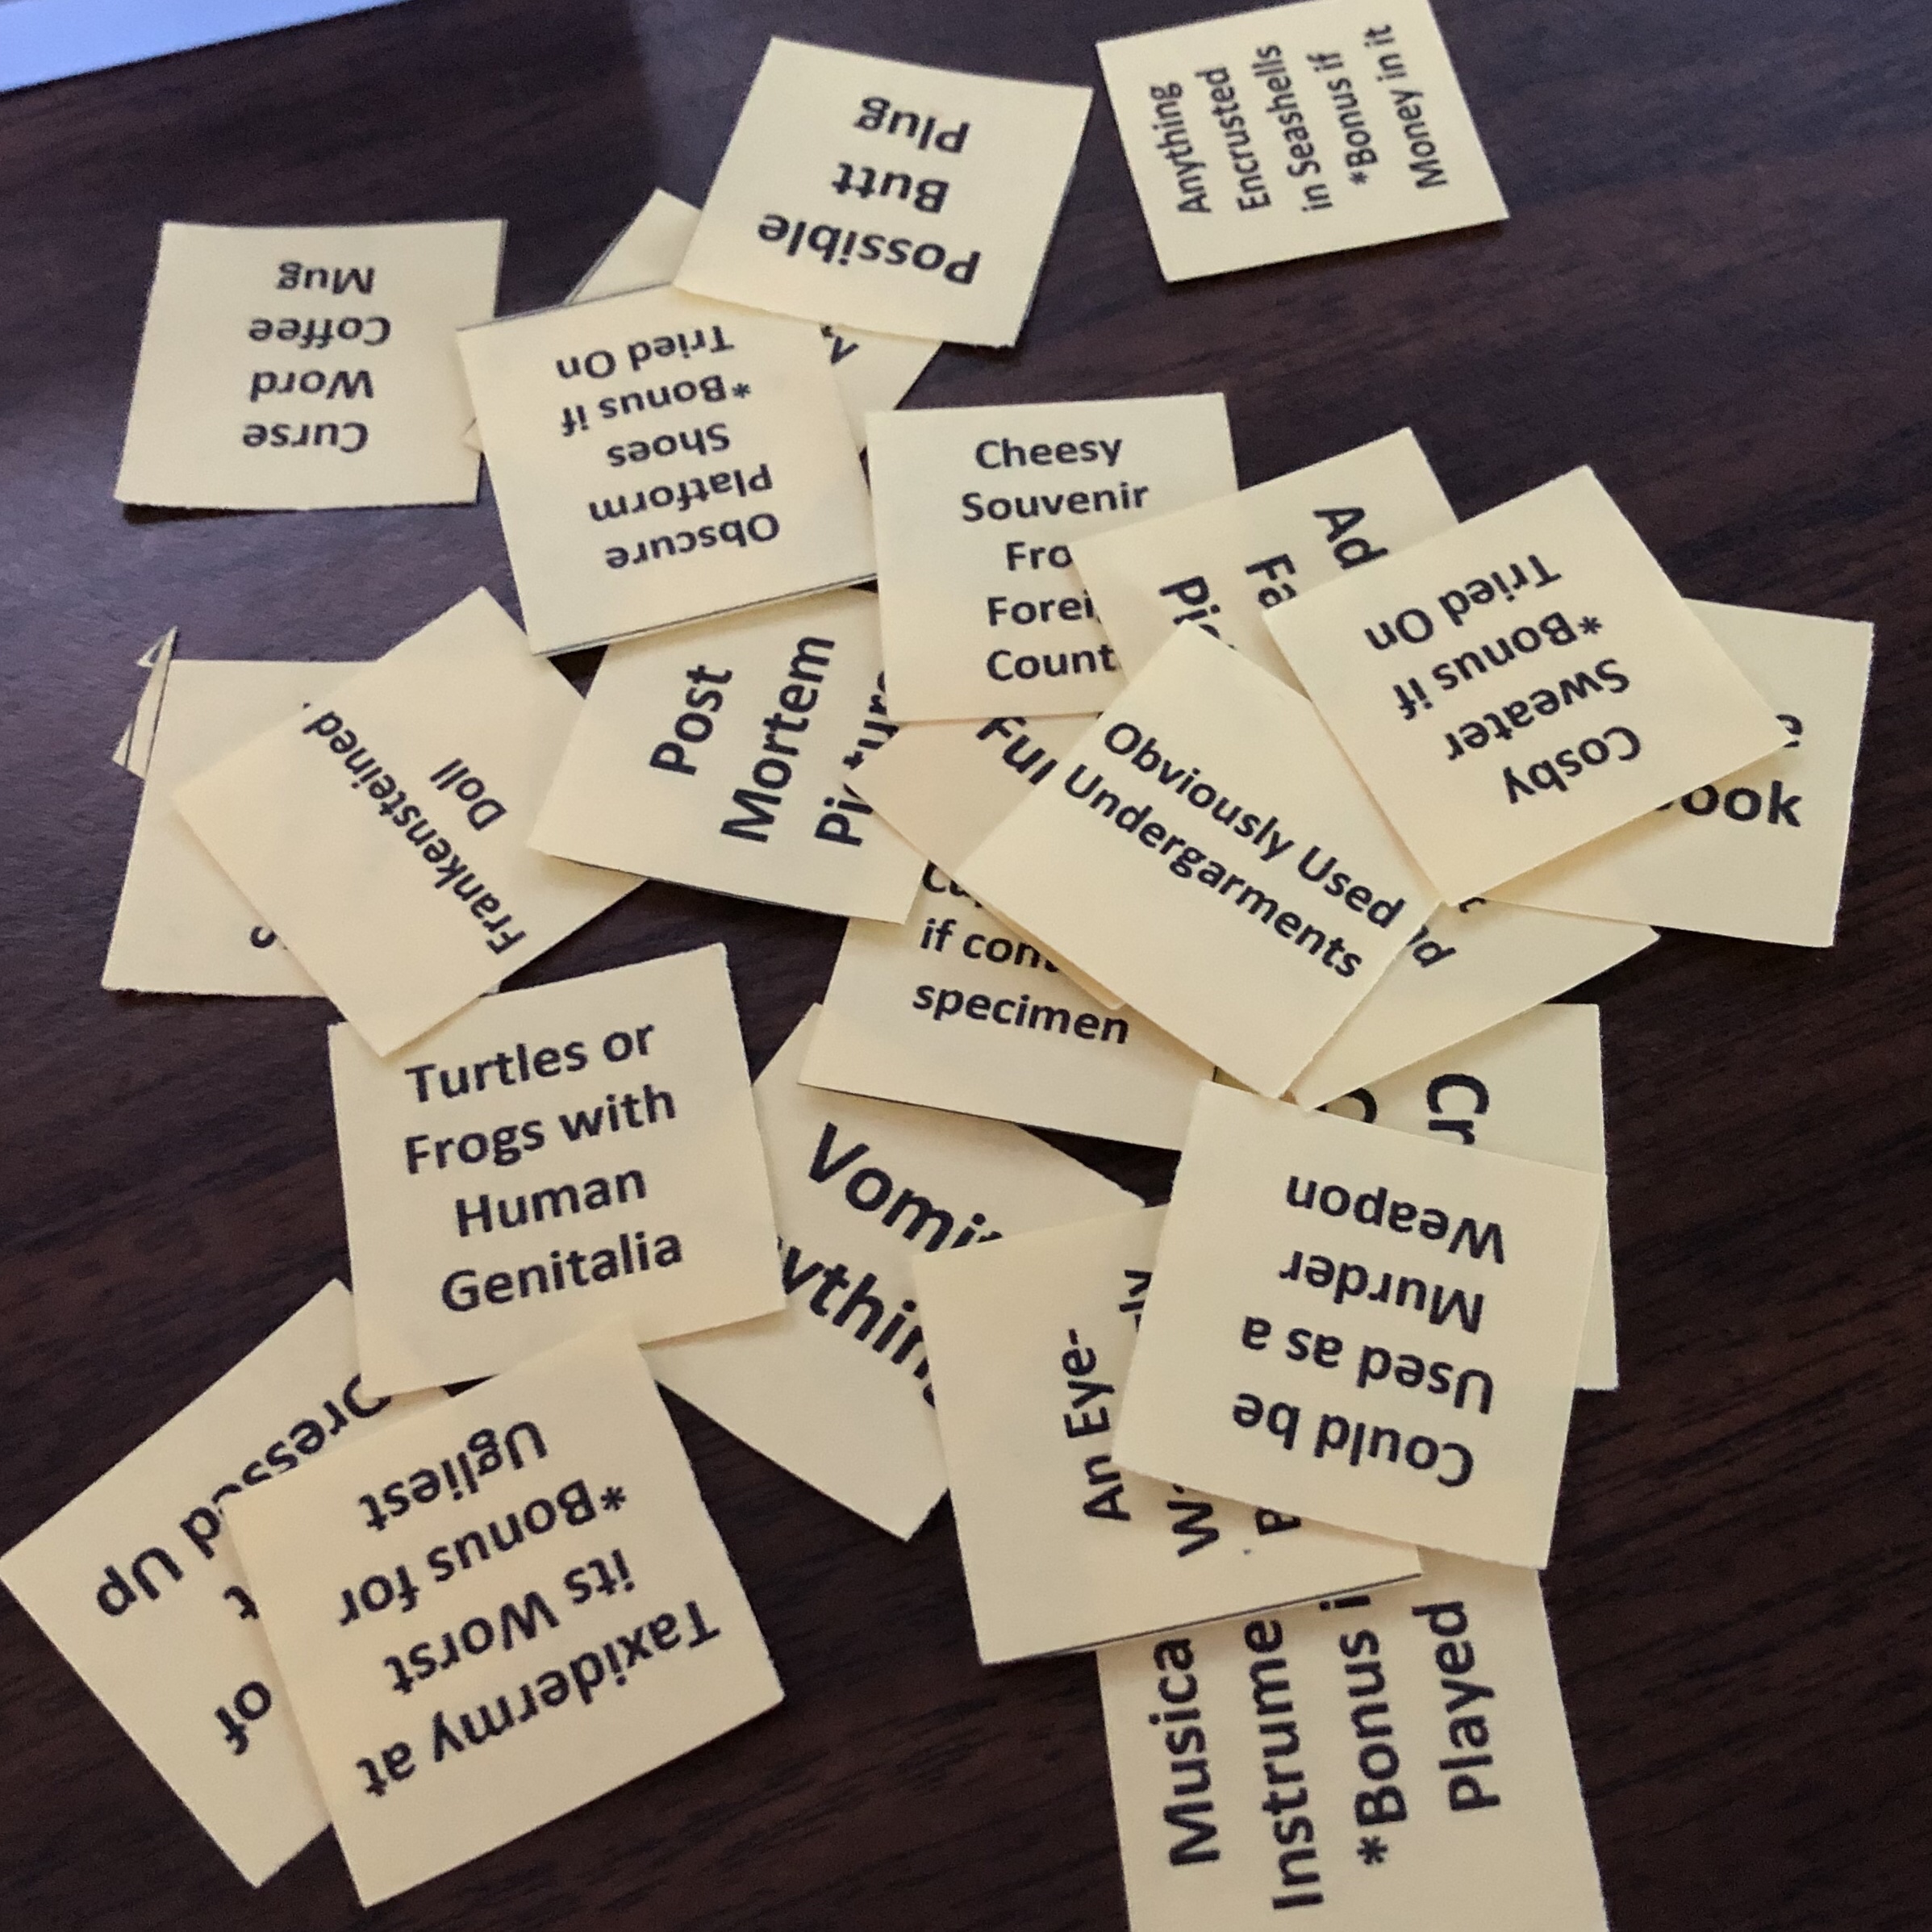
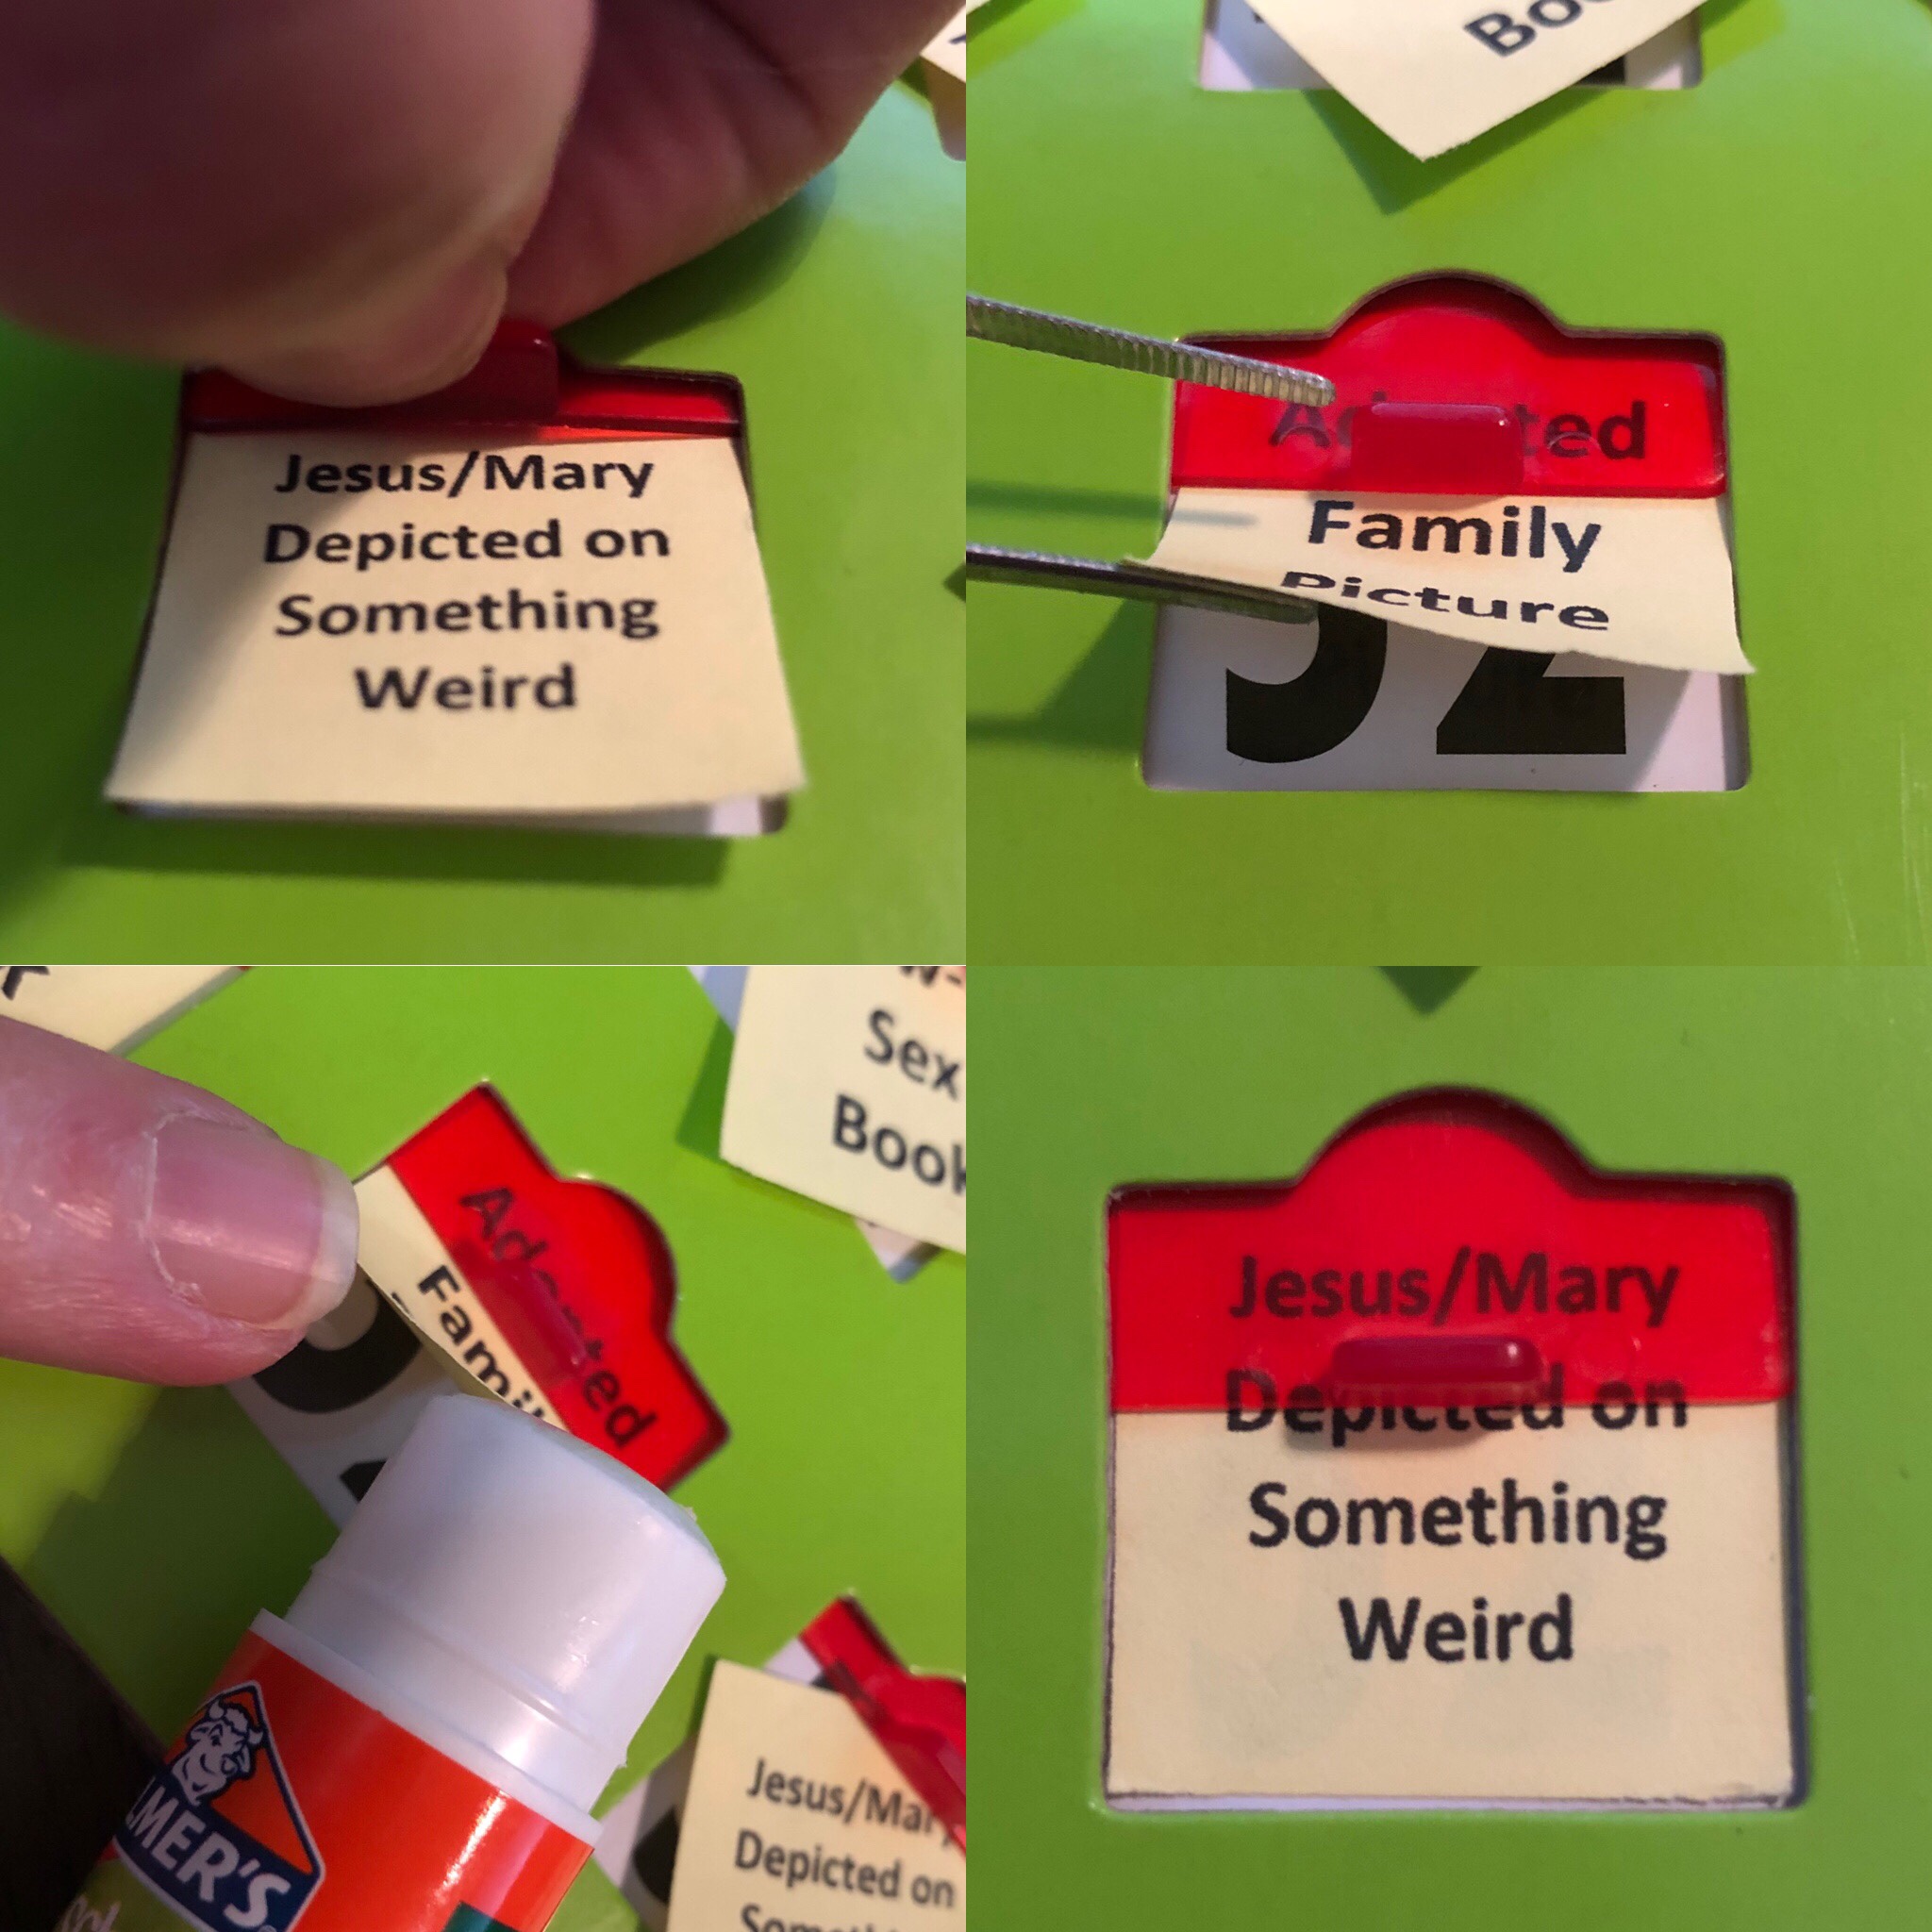
- Cut the grid into strips.

- Use the 1" hole punch to cut out the squares. Be sure to center up as much as possible by turning the punch over and looking through the window.Doubling up with a blank strip of paper, a bit wider, helped get cleaner edges and it was easier to fine tune the position before punching the square.

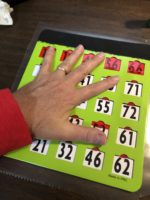
- Using the Bingo Card PDF as a guide match the tiles in the matching windows.
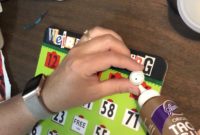
- Pull down the window a bit and tuck a corner of the paper tile under it.
- Position each paper tile, using the craft tweezers to keep one corner up. Use the glue stick to adhere the bottom ½ of the tile inside the bingo card window. Be sure to get both bottom corners.Be careful not to glue the window slide. The slide will hold the top of the tile in place.

- Let completely dry with all the windows on the card open.
Optional
- Put small buttons, using the same color you used on the cards, in a small jewelry bag. When starting the game, each player blindly draws a button to see what card they will be using.

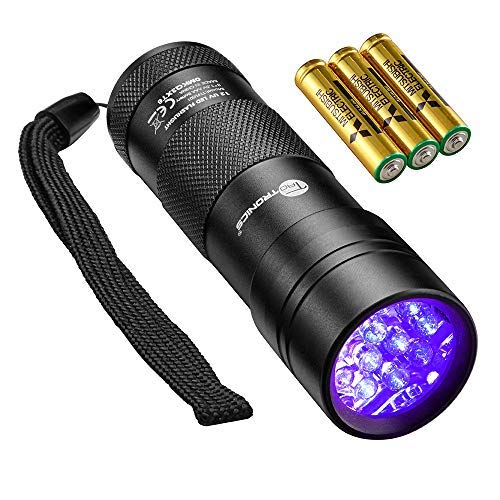
- Purchase a hand held UV black light (under $10) and keep with the game. The person who gets the card with the "Uranium Glass" carries the light for the day, https://amzn.to/2yvUXir

- While out shopping second hand things look for the perfect "weird" case to keep cards in.
Notes
The shelf paper on the back of the card is to keep it clean and readable.And it will help keep spills from soaking into the cardboard. It is also cheap and easy to push out the bubbles.
Use the 1" square punch, they are not expensive and will save you a BIG headache. The lines between the tiles on the PDF are not exactly 1".
This project took me several days to complete due to trial and error, shopping for the perfect supplies, preparing the PDF cards, taking photos, and writing down the instructions that worked. It should take a total of a few hands-on hours to complete a set of cards with these instructions. There is a lot of drying time between sessions though.
Store your cards in one gallon zip lock bags, with the windows closed to protect the paper tiles.